

Tile and Waterproofing Questions to Ask Before a Bathroom Remodel Starts
Before a bathroom remodel starts, ask about waterproofing, tile layout, shower pans, drains, niches, grout, ventilation, and long-term durability.
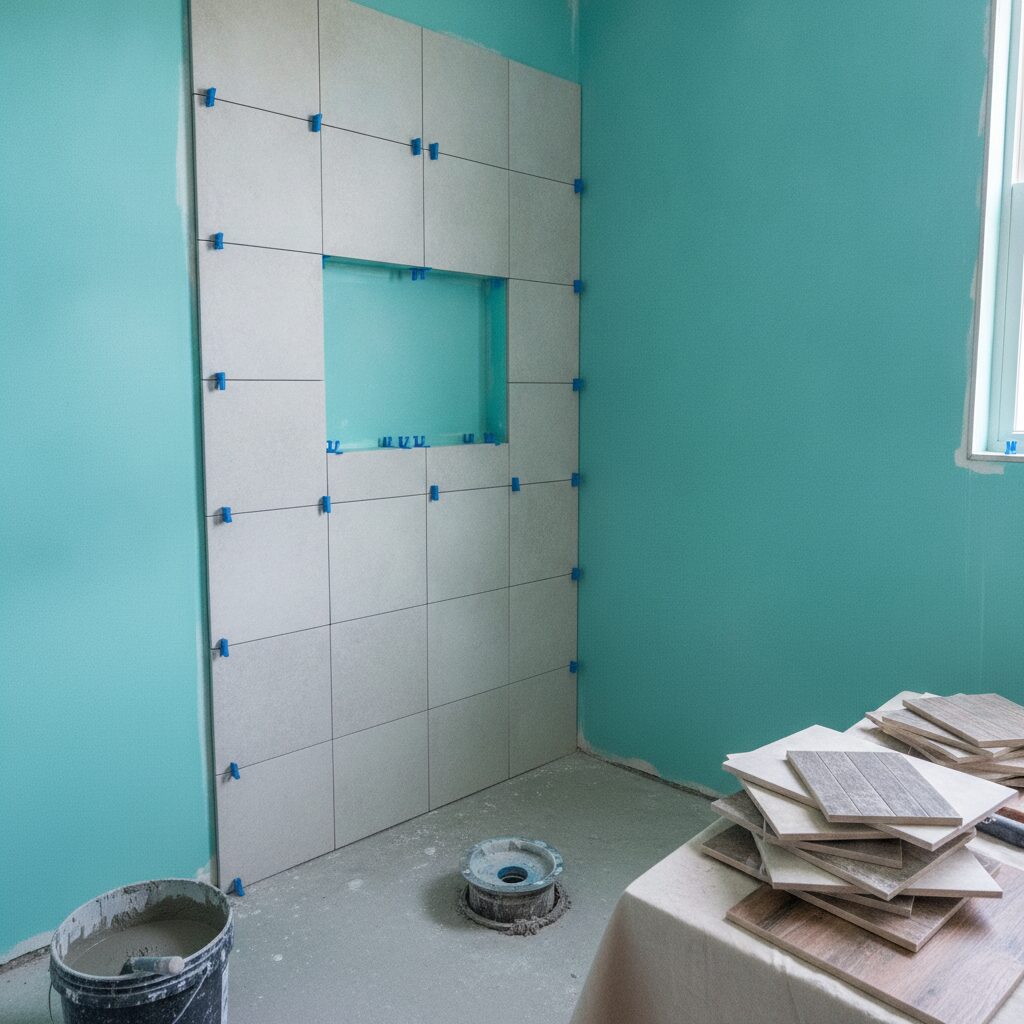
For homeowners in Davis and Weber Counties, the most useful bathroom tile waterproofing questions are about the hidden system: where the wet zones begin and end, how the selected waterproofing assembly is coordinated, how the shower base and drain relate, where niches and penetrations land, what the tile layout requires, how moisture leaves the room, and what will be documented or inspected before finishes cover the work.
Beautiful tile matters. It just cannot carry the moisture-control plan by itself. A clear scope should explain the sequence step by step without asking you to approve technical details you cannot see or verify.
Identify the shower, tub surround, wet walls, entries, transitions, and nearby areas that need a clear moisture plan.
Ask for one complete compatible approach tied to selected products, substrate, drain, and current instructions.
Plan the base, drain, corners, entry, niche, bench, valves, glass, backing, and accessory locations.
Test tile size, cuts, pattern, grout visibility, drain relationship, niche alignment, edges, and transitions.
Include ventilation and room use in the same conversation instead of treating them as a later cosmetic upgrade.
Know which product documents, photos, walkthroughs, tests, or required inspections happen before tile hides the work.
- Which areas are treated as wet zones, and where does the waterproofing approach stop or transition?
- What complete system is planned, and who confirms compatibility with the selected drain, substrate, and accessories?
- Where will the niche, bench, valves, shower glass, grab-bar backing, and other penetrations be located before installation?
- How will the tile layout be reviewed before cuts, grout lines, and drain relationships are locked in?
- What concealed-work documentation and jurisdiction-specific inspections must be complete before tile begins?
Why Does the Work Behind the Tile Matter More Than the Finish You See?
A finished bathroom shows tile, grout, glass, fixtures, and paint. It does not show the waterproofing, substrate transitions, drain connection, backing, penetrations, or the condition of the structure and plumbing discovered during demolition. Those hidden relationships are where the planning discipline lives.
That does not mean a homeowner needs to write an installation specification. You should not have to choose membrane overlaps, fastener spacing, test durations, slopes, or cure times from a blog post. Those details must come from the selected system, current manufacturer instructions, project documents, qualified professionals, and the applicable authority.
Your role is to ask whether the system has been defined. Is the proposal describing one compatible assembly, or is it listing separate products without explaining how they work together? Does the scope show where water is expected, how transitions are addressed, and what must be confirmed before the finish goes on?
This is the difference between selecting tile and planning a bathroom remodel waterproofing strategy. Tile is a visible finish decision. The wet-zone plan connects the base, walls, drain, corners, openings, penetrations, ventilation, and the sequence of concealed work.
The Fortress tile and waterproofing page can help you identify the topics that belong in the conversation. What this means for you is that the proposal should make the hidden system understandable without pretending every bathroom uses the same technical detail.
Tile, grout, trim, glass, fixtures, niche shelves, edges, pattern, color, and the finished room.
Wet-zone limits, waterproofing assembly, substrate, base and drain coordination, transitions, penetrations, backing, and ventilation.
Selected product information, current installation requirements, project-specific details, concealed-work documentation, and required inspections.
What Exactly Is the Wet Zone, and How Should the Waterproofing System Be Described?
Start by asking someone to point to the wet zones on the plan. A shower is obvious, but the decision also involves its walls, base, entry, corners, ceiling conditions where relevant, and any connection to a tub deck, bench, niche, half wall, or nearby floor. A tub surround and a freestanding tub create different questions. A curbless or low-entry direction can affect more than the visible threshold.
The answer should be specific to the room without pretending to be universal. Which surfaces are included? Where does one material or assembly transition to another? Which penetrations pass through the wet area? How are the selected drain, valve, showerhead, body spray if included, tub filler, glass, grab bars, and accessories coordinated?
Next, ask how the waterproofing approach is named in the scope. “Waterproof as needed” is too vague. You are looking for enough information to know that the project team has selected a complete, compatible approach and assigned responsibility for the substrate, corners, transitions, penetrations, base, drain connection, and product documentation.
Compatibility matters because systems are not interchangeable collections of parts. A general article cannot approve one brand, membrane type, drain, backer, sealant, or adhesive for every room. The selected manufacturer information and project documents should control the actual assembly.
Also ask what demolition may change. Existing framing, subfloor, plumbing location, old repairs, damage, or an out-of-level condition can affect the final scope once exposed. Do not let anyone diagnose hidden conditions from cracked grout, an odor, a stain, mildew, a loose tile, or a soft-feeling area alone. Those are reasons to investigate and document, not proof of one specific failure.
A clear bathroom remodel plan should separate known scope from conditions that require review after demolition. That is how you reduce surprises without promising that every concealed condition can be predicted.
Where does the wet zone begin, end, turn a corner, meet the bathroom floor, or transition to another assembly?
What complete compatible approach is selected, and which current documents govern the actual installation?
Who confirms substrate, drain, penetrations, backing, concealed conditions, documentation, and approval before cover?
Room use, desired shower or tub direction, fixture locations, accessibility needs, tile direction, storage, ventilation goals, and the visible design.
Wet-zone boundaries, selected waterproofing approach, base and drain direction, niche and bench locations, backing, penetrations, layout review, and responsibility for documentation.
Existing substrate, framing, subfloor, plumbing, previous repairs, level and alignment conditions, and any project-specific change required by what demolition reveals.
Current product instructions, required concealed-work checkpoints, jurisdiction-specific inspections, photos or walkthroughs, and authorization to cover the work.
How Should the Shower Pan, Drain, Entry, Niches, Benches, and Penetrations Be Coordinated?
The shower base and drain are not separate shopping decisions. Their relationship affects the waterproofing approach, floor tile layout, cuts, entry, glass, and the work below the finish. Ask when the drain is selected, who confirms compatibility, and how the base and drain connection will be documented before tile.
Do not ask a general article for an exact slope, curb height, overlap, test duration, or drain detail. Ask the project team which selected-system documents control those items and how the actual room will be checked. The honest answer should point to the specific assembly, not a rule of thumb presented as universal.
The entry deserves the same attention. A curb, low threshold, or curbless direction can affect the bathroom floor, framing or substrate conditions, glass, drainage, transitions, and adjacent finishes. The plan should show the intent early enough for the team to evaluate it, not leave it as a tile-installer decision.
Niches and benches create useful storage or seating, but they also create more corners, edges, substrate transitions, and layout relationships. Decide their size and location in relation to the tile pattern, fixtures, reach, and what you intend to store. A niche that fits shampoo bottles but forces awkward sliver cuts or conflicts with plumbing may need adjustment before the wall is closed.
Valves, showerheads, handheld supports, glass clips, door hardware, grab bars, towel hooks, and other accessories can require penetrations or backing. The right time to locate them is before waterproofing and tile cover the wall. Ask what needs backing, which items require exact product information, and who owns each installation detail.
The walk-in shower planning page is a useful place to organize those decisions. Bring the desired use, not only a finished photograph. Tell the team who uses the shower, what needs to be within reach, whether a bench or handheld matters, and which details must remain easy to clean.
Confirm the selected relationship, compatibility responsibility, tile layout effect, and concealed-work checkpoint before the finish is installed.
Coordinate threshold direction, adjacent floor, wall alignment, backing, hardware, and the way the door or panel will operate.
Set location, use, reach, tile alignment, corners, shelves, and the items that must fit before the wall assembly is closed.
Use exact current product information where required so plumbing, trim, tile, and finished clearances are coordinated.
Identify backing and locations early. Do not assume every item can be safely added after tile.
Review wall-to-floor, corner, tub, bench, half-wall, doorway, and material-change conditions as part of one system.
How Do Tile Size, Pattern, Grout, Edges, and Maintenance Affect the Plan?
Tile size is not only a style preference. It affects the number and visibility of grout lines, the scale of the pattern, the cuts at walls and corners, the relationship to the drain, and the way a niche or bench aligns. A small sample cannot show the whole installed composition.
Ask for a layout review before installation. Where is the visual center? Which wall gets the strongest alignment? What happens at the shower entry, niche, plumbing trim, bench, ceiling, and outside corners? Are there narrow cuts that can be reduced by adjusting the starting point or the feature location? These are visual planning questions, not instructions for the installer.
Pattern needs room context. A bold veining direction or repeated geometric tile may look controlled on one wall and busy when wrapped through several planes. A quieter field tile may make a niche or hardware detail more intentional. Review the room as a whole so every surface does not compete.
Grout color and joint appearance affect both the design and the maintenance conversation. A closely matched color can soften the grid; contrast can emphasize it. The exact joint and material requirements belong to the selected tile, manufacturer information, system, substrate, and installer. Do not approve an unsourced universal number.
Edges and transitions deserve a named plan. How will exposed tile edges finish? Where does tile meet painted wall, glass, a tub, a vanity, a threshold, or another floor? Which trims or profiles are being considered, and how do they relate to hardware and fixtures? Those details are easiest to resolve before the tile order and layout are final.
Maintenance should be product-specific. Ask for current care information for the selected tile, grout, sealant, stone if used, metal trim, glass, and fixtures. Avoid broad promises such as maintenance-free, stain-proof, mildew-proof, or never needing service. A bathroom built to last is one whose care expectations fit the household.
When a tub is part of the room, use the bathtubs and spa upgrades page to identify surround, deck, filler, access, storage, and cleaning questions. The goal is not an over-staged room. It is a durable, real-life layout with clear transitions.
Review the full wall or floor relationship, not only one sample, so movement and repetition fit the room.
Study the drain, niche, fixtures, corners, entry, ceiling, outside edges, and the places where narrow cuts may become visible.
Use exact product instructions for cleaning, sealing where applicable, maintenance, variation, and acceptable appearance.
How Does Ventilation Fit Into the Bathroom Moisture-Control Plan?
Ventilation belongs in the design conversation because the room produces moisture during normal use. It should not be treated as a decorative item selected after tile, lighting, ceilings, and cabinetry are fixed.
Start with use. How many people use the bathroom, how often, and for how long? Is the shower enclosed? Does the room have a separate toilet area, tall ceiling, window, or door that changes how the space feels? Where is the existing fan, how is it controlled, and where does it exhaust? Those questions help the qualified project team evaluate the actual need.
A general article should not size a fan, specify ducting, promise quiet performance, or claim ventilation will prevent mold or moisture damage. It can remind you that source control and ventilation are part of broader indoor-air planning and that the project-specific equipment and route require proper evaluation.
Lighting and ventilation can also compete for ceiling space. Recessed lights, decorative fixtures, shower lighting, duct routes, framing, attic or floor conditions, and other systems may affect placement. Coordinating them early protects the layout and keeps the ceiling from becoming a collection of unrelated field decisions.
Controls should match real use. Ask how the fan and lights are operated, whether someone can easily understand them, and how the room will be used after a shower. The exact control approach belongs to the project, but the desired behavior should be clear before wiring and finishes.
The ventilation and moisture-control page can help frame the discussion. What this means for you is that the wet-zone plan and the room-air plan should be reviewed together, even though they use different systems.
Define wet zones, plumbing and fixture relationships, transitions, and any existing moisture concern that needs investigation.
Discuss normal use, enclosure, existing ventilation, ceiling conditions, controls, and the project-specific path for moisture removal.
Do not claim one product, fan, membrane, grout, or maintenance routine can prevent every moisture or mold problem.
Source basis: The U.S. Environmental Protection Agency states, “The Key to Mold Control is Moisture Control.” The NKBA’s 2026 planning-guideline update identifies expanded guidance on waterproofing, wall backing, material performance, illumination, power planning, and ventilation. Locally, Farmington City’s inspection list includes “Shower Pan,” showing why concealed wet-zone work may have a checkpoint before tile covers it. Exact requirements still depend on the correct jurisdiction and project.
What Should Be Documented or Inspected Before Tile Covers the Work?
Ask for a concealed-work plan before construction begins. Which product information will be kept with the project? Which details receive photographs? Will there be a homeowner or project-team walkthrough? What must be approved before the next layer is installed? The answer should match the selected system and scope.
Photos can be useful for recording the location of backing, plumbing, wiring, waterproofed surfaces, or other concealed conditions, but they are not a substitute for required inspections or qualified review. Ask who takes them, what they need to show, where they are stored, and how they connect to the project record.
Local requirements must be jurisdiction-qualified. Farmington City’s published inspection list includes a shower-pan inspection. Kaysville lists remodels and electrical, mechanical, or plumbing work among permit categories. Davis County explains that a property inside a municipality uses that city’s permit authority, while county-administered properties follow the county process.
Do not turn those examples into one Davis-and-Weber rule. The correct authority depends on the address and exact scope. A bathroom with relocated plumbing, electrical changes, HVAC work, structural changes, or a new shower may be treated differently from a finish-only update. Verify the current process before work begins.
Also ask how changes are handled. If demolition reveals a different substrate, plumbing location, damaged area, previous repair, or another condition, who pauses the work, documents it, explains the options, and updates the scope? No surprises does not mean pretending concealed conditions never exist. It means having a clear path for decisions when they appear.
Document visible symptoms and locations without diagnosing the cause. Confirm the intended scope, permit authority, and investigation plan.
Review actual framing, substrate, plumbing, previous repairs, and conditions that may change the planned assembly or scope.
Confirm backing, niches, benches, valves, fixtures, glass support, penetrations, transitions, and selected-system documents.
Complete required inspections, approved testing where applicable, photos, walkthroughs, and authorization tied to the actual project.
Review visible finish, operation, care information, remaining documentation, and any written warranty documents supplied for the project.
Which Questions Should You Have Answered Before Tile Work Begins?
You do not need to become a waterproofing installer. You need a clear scope that shows the plan is more than tile color. Bring your questions into the design phase, while the shower, tub, storage, fixtures, layout, ventilation, lighting, and access can still be coordinated.
Tell the team what you see in the existing bathroom and where. Cracked grout, recurring mildew, staining, loose tile, soft-feeling areas, or an odor may justify further evaluation, but they do not prove one cause. Avoid language that promises a diagnosis before demolition and inspection.
Use the Fortress bathroom portfolio to point to details you like: a niche relationship, tile scale, shower entry, vanity connection, lighting, storage, or tub direction. Treat the image as a communication tool, not proof of the same hidden assembly, cost, product, schedule, or permit path in your home.
- Where are the wet zones, and how are all boundaries and transitions shown?
- What complete compatible waterproofing approach is planned, and which current documents govern it?
- How are the base, drain, entry, corners, niche, bench, valves, glass, backing, and accessories coordinated?
- When will the tile layout be reviewed for cuts, pattern, grout visibility, drain relationships, and edges?
- What existing conditions may change the scope after demolition, and how will those decisions be documented?
- How are ventilation, lighting, power, and ceiling conditions coordinated with the wet-zone plan?
- Which photos, walkthroughs, tests, product documents, and required inspections happen before tile covers the work?
- Who provides the final care instructions and written warranty information for the selected products and completed scope?
Frequently Asked Questions
Is tile or grout itself the whole waterproofing plan?
No. Treat tile and grout as visible parts of the finished assembly, not as the complete moisture-control answer. Ask what compatible waterproofing system is specified for the wet zone and how it connects to the base, drain, transitions, and penetrations.
What should I ask about a shower pan before approving the remodel?
Ask which selected system and drain are being coordinated, who confirms compatibility, what project documents control the details, and what required inspection or concealed-work checkpoint must happen before tile.
How are niches, benches, valves, and shower glass coordinated with waterproofing?
Set their locations and product direction early enough to plan backing, corners, penetrations, tile alignment, and mounting. The exact construction details must follow the selected system and project-specific review.
Does bathroom tile work require a permit or inspection in Davis or Weber County?
The answer depends on the property, municipality or county jurisdiction, and exact scope. Farmington’s published list includes a shower-pan inspection, while other jurisdictions publish their own remodel and trade-work processes. Confirm with the correct authority.
Can cracked grout or mildew tell me exactly where the problem is?
No. They are observations to document and investigate, not proof of one defect or health outcome. Tell the project team what you see, where it occurs, and how often, then ask how existing conditions will be evaluated.
What documentation should I request before tile is installed?
Ask which current product information, photos, walkthroughs, approvals, tests where applicable, and required inspections will be completed before concealed work is covered. The list should match the actual system and jurisdiction.
Ready to talk through scope and timeline? A design consult is the right first step.
For a bathroom in Davis or Weber County, ask how we plan wet zones, waterproofing, tile layout, and ventilation before finishes are installed. If your current bathroom has cracked grout, mildew, soft spots, or recurring moisture concerns, describe what you see and where so the condition can be evaluated without guessing at the cause.
Call (801) 580-3522