
Kitchen Remodel in Stages: How to Prioritize When You Can’t Do It All
Not every kitchen remodel happens in one big, clean sweep—and that’s okay.
Sometimes the budget needs breathing room. Sometimes you’re living in the home and can’t handle a full shutdown. Sometimes you discover hidden constraints (layout, plumbing, electrical, ventilation) that push you to phase the work intelligently.
This homeowner-friendly guide explains how to do a kitchen remodel in stages without creating expensive rework later. You’ll learn:
- how to define the problems you’re solving (not just the finishes you want),
- what to prioritize first so your kitchen works better quickly,
- which upgrades should be grouped together because they share rough-ins, permits, or sequencing,
- how to protect your final “end-state” design so phase 1 doesn’t sabotage phase 3,
- and a practical checklist you can use before you start demo or order materials.
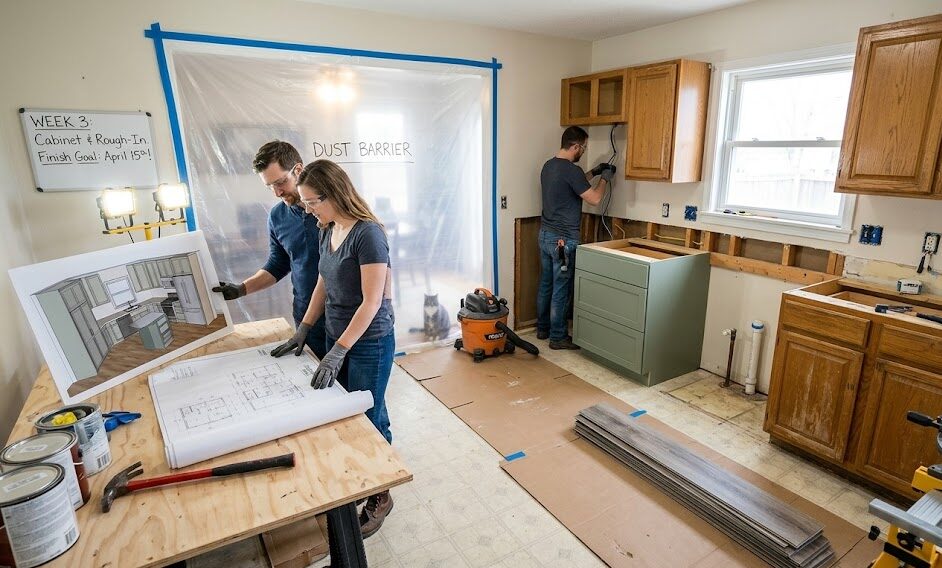
The Fortress Builders is a Utah design–build company built on “strength through structure.” Every project starts with a detailed design blueprint that aligns vision, budget, and timeline—so even a phased remodel can stay coherent, code-compliant, and built to last.
Helpful internal pages while you plan:
What “remodeling in stages” really means (and what it doesn’t)
A staged kitchen remodel is not “doing random upgrades whenever you feel like it.” It’s a planned sequence that respects three constraints:
- Systems: plumbing, electrical, ventilation, and structure can force certain work to happen together.
- Dependencies: cabinets depend on layout; countertops depend on cabinets; lighting often depends on cabinet plan; flooring depends on cabinet footprint and appliance choices.
- End-state design: your phase 1 decisions should support the final kitchen you want—so you don’t pay twice.
Homeowner takeaway: A “smart staged remodel” starts by defining the final kitchen plan, then deciding what to build now vs later—without breaking the plan.
Start with clarity: the 5 questions that determine your priorities
Before you choose phases, get specific about what’s driving the remodel. These five questions do most of the heavy lifting:
Priority-setting questions (write your answers down):
- What frustrates you daily? (lack of prep space, poor storage, bad lighting, awkward traffic flow, noisy/weak ventilation, dated finishes)
- What is functionally broken? (failing appliances, damaged flooring, unsafe outlets, plumbing leaks, moisture/odor problems)
- What must be addressed for safety or code? (electrical updates, proper ventilation, load issues)
- What is cosmetic vs structural? (paint vs layout, hardware vs cabinetry quality, lighting upgrade vs full rewiring)
- What is the final end-state kitchen? (layout, island size, appliance locations, storage zones)
Even if you plan to phase the work, you’ll get better outcomes by locking the layout logic early. If you need a framework, start here: Work Triangle vs. Work Zones.
The golden rule: design the final kitchen first—even if you build it later
This is the most important concept in staged remodeling: your phase plan should be based on a final design blueprint.
Why? Because kitchens are interconnected systems. A change in one place affects everything else:
- Move the sink later and you might move plumbing, electrical, cabinets, and countertops.
- Change appliance locations later and you might require cabinet reconfiguration and new circuits.
- Upgrade ventilation later and you may need ducting planned before cabinets close in the chase.
Planning mantra: “Draw the destination. Then pick the safest route.”
Which upgrades belong together? (so you don’t pay twice)
Some kitchen upgrades are “standalone.” Others are tightly linked. Here’s a homeowner-friendly grouping:
Group A: Layout + cabinetry + countertops (the “spine” of the kitchen)
If your staged remodel includes changing cabinet layout, island size, or storage zones, treat this as a major phase—because it cascades into everything else.
Related: Design and Layouts for Kitchens and Cabinets and Countertops.
Group B: Electrical + lighting + appliance power
Lighting improvements can be phase-friendly, but if you’re changing appliance placement or adding power-demanding upgrades, it’s best to coordinate circuits, outlet placement, and switching now.
Related: Kitchen Lighting & Electrical Designed for Real Life.
Group C: Ventilation (range hood) + make-up air planning
Ventilation is easy to underestimate—and expensive to retrofit if you wait too long. If your end-state kitchen includes stronger ventilation, plan duct routing early.
Helpful reads: Range Hood CFM Sizing and Make-Up Air in a Kitchen Remodel.
Group D: Flooring + base cabinets
Kitchen flooring can be staged, but you need to decide whether the flooring will run under cabinets (often preferred for future flexibility) or be cut around them (more common in older installs). This impacts the “do it now vs later” decision.
Related: Durable Kitchen Flooring & Surfaces Built to Last and Durable Kitchen Flooring for Utah Homes.
Important note: If your project includes changes to wiring, ventilation ducting, structural openings, or plumbing moves, permit and inspection requirements can vary by jurisdiction and scope. Confirm requirements with qualified professionals and local authorities.
How to choose your phases (3 staged remodel models that work)
Most staged kitchen remodels fall into one of three models. The “best” one depends on whether your pain is functional, cosmetic, or system-driven.
Model 1: Function-first staging (most common for busy families)
Goal: improve daily workflow quickly, then upgrade finishes later.
|
Phase 1
Fix workflow bottlenecks: lighting upgrades, better storage inserts, targeted appliance replacement, and small layout improvements that don’t require full cabinet replacement. Examples: under-cabinet lighting, better task lighting, replace failing dishwasher, improve ventilation if it’s weak/noisy. |
|
Phase 2
Cabinet/countertop phase: final layout, cabinetry, countertops, sink placement, and appliance integration. |
|
Phase 3
Finish + polish: flooring (if not done earlier), backsplash, paint, hardware, final fixtures, and finishing details. |
Model 2: Systems-first staging (best when safety/performance is the issue)
Goal: handle electrical/ventilation/plumbing risks early, then build the kitchen around solid infrastructure.
- Phase 1: electrical updates, ventilation ducting plan, any plumbing rough-in moves needed for the final layout.
- Phase 2: cabinets + countertops + appliances installed to match the updated systems.
- Phase 3: finishes, lighting polish, flooring upgrades if still needed.
Model 3: Aesthetic-first staging (only works if the layout is staying put)
Goal: update the look without triggering expensive rework.
This model can work when the layout is solid and you’re not moving plumbing or appliances.
- Phase 1: paint, lighting improvements, hardware, backsplash refresh, possibly counters if cabinet boxes are worth keeping.
- Phase 2: flooring upgrade, appliance updates as needed.
- Phase 3: cabinetry replacement only if/when budget allows (but plan carefully so earlier upgrades still fit).
Warning: If you know you’ll replace cabinets later, be cautious about doing countertops now—because the counter template is tied to the cabinet plan.
Priority framework: what to do first when money is tight
If your budget forces you to choose, use this order-of-operations framework. It’s intentionally practical.
Priority 1: Fix safety and “can’t ignore” problems
- Electrical hazards (outdated wiring, insufficient circuits for modern appliances, unsafe outlets)
- Water issues (leaks, chronic moisture damage)
- Ventilation problems that cause lingering odors, grease buildup, or poor air quality
- Flooring hazards (trip points, swelling, structural soft spots)
Priority 2: Fix workflow bottlenecks that create daily friction
- Poor lighting (especially lack of task lighting)
- Storage that doesn’t match how you cook (no pantry logic, unusable corners)
- Appliance placement conflicts (dishwasher blocks walkway, fridge door hits island seating)
- Traffic cutting through the cook zone
Priority 3: Improve “ROI comfort” upgrades you’ll feel immediately
- Under-cabinet lighting and dimmers
- Better ventilation and quieter fans
- Upgraded faucet/sink functionality (if not moving later)
- Durable flooring that makes the room feel finished
Priority 4: Cosmetic finishes
Finishes matter, but they should be built on a functional plan. This is where backsplashes, paint, decorative fixtures, and styling choices typically land.
Simple test: If you fixed all finishes tomorrow but kept your current layout and lighting, would the kitchen still feel frustrating? If yes, focus first on workflow and lighting.
Phase planning detail: layout and storage zones (where most staged remodels go wrong)
Most rework happens because a staged remodel didn’t respect kitchen zones. Even if you can’t rebuild everything today, you can plan zones now:
- Prep zone: where chopping, mixing, and meal assembly happens.
- Cook zone: range, hood, cooking tools, landing for hot pans.
- Clean-up zone: sink, dishwasher, trash/recycling.
- Pantry zone: dry goods, snacks, small appliances.
- Serve zone: plates, cups, table access.
If you’re designing for real life, these pages help: Design and Layouts for Kitchens and Pantry Design Ideas.
How to prevent “phase 1” from sabotaging “phase 3”
These are the most common ways staged remodels accidentally create future cost.
Sabotage #1: Buying appliances without confirming the final cabinet plan
Appliances have dimension and clearance requirements. If you purchase early, confirm they fit your future layout and cabinet specs.
Related: Built-In Appliances Planning.
Sabotage #2: Doing flooring now without knowing cabinet footprint
If cabinets move later, flooring seams and gaps can become visible. Decide early whether you want continuous flooring under cabinets or a staged approach that still looks finished.
Sabotage #3: Painting now when you’ll open walls later
If your future phase involves moving electrical, ventilation, or plumbing, you may reopen drywall. Save final paint for later if significant rough-in work is coming.
Sabotage #4: Skipping ventilation planning
Duct routing often needs early planning. If your end-state includes a better hood system, plan that route now—even if the final hood is installed later.
Staged remodel success metric: If you stop after Phase 1, the kitchen should feel meaningfully improved. If you continue to Phase 3, Phase 1 should not need to be demolished or undone.
Practical “staged remodel” checklists
Checklist 1: Define your end-state kitchen (before you phase)
- Layout: Are you keeping the sink, range, and fridge locations? If not, what’s the final plan?
- Zones: Where are prep, cook, clean-up, pantry, and serve zones?
- Appliances: What sizes and types are planned (range/hood, fridge depth, dishwasher, microwave)?
- Ventilation: What is the end-state hood plan and duct route?
- Lighting: Where do you need task lighting, ambient lighting, and switches/dimmers?
- Storage: Which storage problems are you solving (pantry, trash, drawer depth, corner solutions)?
- Clearances: Have you checked door swings, walkways, and seating clearances?
Checklist 2: Choose the phases
- Phase 1 goal: What daily pain should be gone after phase 1?
- Phase 1 scope: Which items can be done without rework later?
- Phase 2 “spine”: When do cabinets/counters/layout changes happen?
- Phase 3 finishes: What is safest to save for last (paint, backsplash, final trim, hardware)?
- Living plan: How will you cook/clean during each phase (temporary kitchen plan)?
- Permits/inspections: What scope items likely trigger permits? (Varies by jurisdiction—confirm with pros.)
Checklist 3: Pre-order verification (avoid costly surprises)
- Cabinet drawings: do they reflect the final appliance specs and clearances?
- Countertop template timing: aligned with cabinet install and sink/faucet selection?
- Electrical: outlets and circuits planned for final appliance locations?
- Ventilation: duct route planned and feasible before cabinets close in access?
- Flooring transitions: planned if flooring is phased (thresholds, seams, appliance height changes)?
How staged remodels connect to timeline and cost (what to expect)
Staging can reduce disruption, but it can also increase total cost if it creates extra mobilization, repeated site prep, or rework. The goal is to stage in a way that:
- minimizes demolition overlap,
- keeps rough-ins aligned with final plan,
- reduces “double handling” of finishes,
- and avoids ordering materials that won’t fit the final kitchen.
If you want a high-level sense of how remodel phases typically sequence (even when staged), start here: Timeline and What to Expect.
Want help prioritizing a staged kitchen remodel without creating rework?
If you’re planning a kitchen remodel in Davis or Weber County and need to phase the work, Fortress Builders can help you build a clear end-state plan first—then map the phases so each stage improves your kitchen now while protecting the final result.
Request a Design Consult Explore Kitchen Remodeling Planning Checklist
Bring your rough budget range, a few photos, and a list of “daily pain points.” We’ll help you prioritize phases that make sense structurally, functionally, and financially—without chaos.