

How to Brighten a Basement Without Making It Feel Like an Office
How to use layered, warm, zone-based lighting so a basement feels comfortable instead of bright, flat, and commercial.
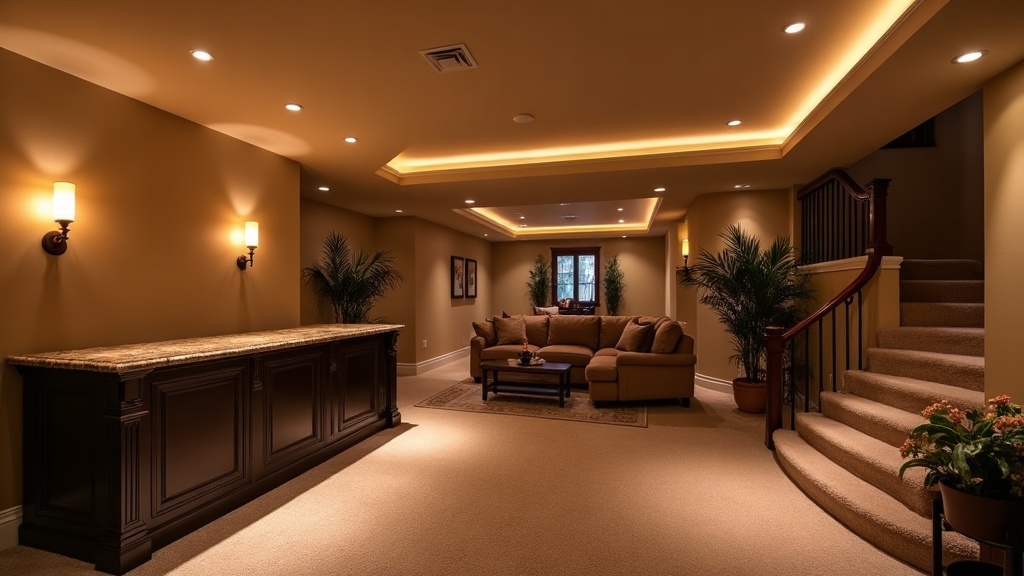
Trying to brighten a basement without making it feel like a row of office lights? The honest answer is that more recessed cans are not always the fix. Basements need layered light because they do not get the same natural light as upstairs rooms.
In Davis and Weber County homes, I often see basements that were wired with one simple grid. The room is technically bright, but it feels flat. A better plan uses ambient light, task light, accent light, stair lighting, and dimmers so the space works for real life.
Here’s what I’d recommend: plan lighting by zone before drywall. That gives you a clear scope for wiring, controls, switches, outlets, and future use.
Why basements need layered light
Basements usually have less natural light, lower ceilings, and more mechanical obstacles than upstairs rooms. That means one type of fixture rarely solves the whole space.
Ambient light helps the room feel open. Task light supports desks, bars, games, bathrooms, and storage. Accent light gives warmth around built-ins, walls, stairs, and seating areas.
What this means for you is that a basement lighting design in Utah should start with how the room will be used, not how many cans can fit in the ceiling.
If a decision affects plumbing, framing, electrical, comfort, or daily use, I want it in the scope before construction starts. That is how you protect your home and avoid surprises.
How ceiling height affects fixture choices
Ceiling height controls what is possible. Recessed lights may work in open areas, but low beams, ducts, and soffits may need slim fixtures, sconces, or accent lighting instead.
A finished ceiling should not feel chopped up by random light placement. I’d rather align fixtures with seating, walkways, cabinets, and architectural lines than force a perfect grid that ignores the room.
Before drywall, walk the basement and mark furniture zones. That is when switch locations and fixture spacing become much easier to see.
Lighting by zone: family room, office, bath, theater, bar
A family room needs comfortable light for everyday use and lower light for movies. An office needs face-friendly task lighting, not glare. A bathroom needs strong but balanced vanity light.
A bar or game room needs durable task light at counters, warm light over gathering zones, and safe movement paths. A theater needs dimmable, controlled lighting so screens and projectors are not fighting the room.
Each zone can feel connected without using the same fixture everywhere. The trick is consistent warmth, thoughtful controls, and clean placement.
Outlets, controls, and future wiring
Lighting is tied to electrical planning. Think through outlets for lamps, game tables, desks, TVs, routers, beverage fridges, and chargers before the walls close.
Switches should make sense from stairs, hallway entries, and room transitions. Dimmer placement matters because you will use those controls every day.
If the basement might later become a theater, office, bar, or guest suite, leave smart pathways for wiring now. It is easier before drywall than after paint.
What to decide before drywall
Before drywall, decide room zones, ceiling type, fixture locations, switch banks, dimmers, outlet spacing, TV/data wiring, bar or desk power, and stair lighting.
Also decide what should be bright and what should be calm. A basement can be safe and useful without feeling over-lit.
A good lighting plan helps the finished basement feel connected to your home instead of feeling like leftover space.
A simple planning sequence I’d use
For basement lighting design Utah, I would not start with the prettiest finish or the most expensive feature. I would start with the way your home needs to work when the project is done. That gives the design a job before the crew begins opening walls, setting rough-ins, or ordering materials.
In Davis and Weber County homes, the sequence matters because basements, additions, outdoor spaces, and flex rooms all have existing conditions that can shape the final scope. Ceiling height, window locations, drainage, mechanical access, electrical capacity, door swings, stair paths, and storage needs can all change what is realistic.
Define the daily use
Write down who will use the space, when they will use it, what frustrates them now, and what the room needs to handle five years from now. This keeps the plan tied to real life instead of a trend.
Check the existing conditions
Before design gets too far, look at structure, moisture, utilities, framing, access, ventilation, and local permit questions. Those details tell us what the room can support without surprise rework.
Set the scope before selections
Once the function and constraints are clear, then materials, fixtures, cabinetry, lighting, and finish details can be chosen with confidence. That is how you keep the remodel built to last.
That step-by-step order may feel slower at first, but it usually saves time later. A remodel gets stressful when decisions are made out of order. A clear scope gives you a calmer project, a more realistic timeline, and a final walkthrough that matches what you expected.
What I’d verify before the final scope
Before I called the scope final for How to Brighten a Basement Without Making It Feel Like an Office, I would verify the practical details that can change the build. That may include permits, inspection path, egress, ventilation, drainage, electrical capacity, structural tie-ins, moisture history, material compatibility, or access to mechanical systems.
This is where no surprises really starts. The design can look clean, but the home still has to be buildable. I would rather pause for the right check than push forward and discover during construction that a wall, window, drain, vent, or electrical run needs to move.
If the project touches code-sensitive areas, rental-style use, sleeping space, plumbing, exterior work, or structural changes, verify those details with the right local building department or qualified specialist. That keeps the plan honest and protects your home before the crew is deep into the work.
Questions homeowners ask before they decide
What color temperature is best for a basement?
Most homeowners prefer warm, comfortable light rather than cold blue-white light. The exact selection should coordinate with finishes and fixture type.
Can I add more lights after drywall?
Sometimes, but it is more invasive. Plan wiring and fixture placement before drywall whenever possible.
Do basements need dimmers?
I usually recommend them for family rooms, theaters, bars, offices, and guest areas because basements serve different uses during the day.
Should basement lighting be a grid?
Not by default. A grid can work in some areas, but zoning usually creates a more comfortable real-life layout.
Ready to plan basement lighting before drywall limits your options?
Ready to talk through scope and timeline? A design consult is the right first step. We’ll walk through how your home is used, what the layout can support, what needs to be verified, and how to protect the project from surprise changes.
Planning note: Remodel scope, permits, inspection requirements, and existing conditions vary by city and home. Use this article as a practical starting point, then verify project details through your local jurisdiction and a qualified contractor before construction begins.