
Importance of Kitchen Island Size Guide
Kitchen islands are one of the most requested features in a remodel—and one of the easiest to get wrong. An island that looks perfect on paper can feel cramped, awkward, or under-used if it isn’t sized and placed correctly.
This pillar guide breaks down kitchen island clearances, island seating spacing, and storage ideas that make your island genuinely useful. You’ll also learn when an island doesn’t make sense—and what to do instead.
For a structured “start-to-finish” planning sequence, bookmark the Kitchen Remodel Planning Checklist for Utah Homeowners and the layout overview in Design and Layouts for Kitchens.
Why Islands Feel Amazing (or Miserable) Comes Down to Clearances
Most island regret is not about color, countertop material, or even size. It’s about how the island interacts with movement—people walking through the kitchen, appliances opening, kids grabbing snacks, and two adults trying to cook at the same time.
- Too tight: traffic jams, bruised hips, blocked dishwashers, awkward stool placement
- Too big: wasted steps, poor workflow, and a kitchen that feels smaller than it is
- Just right: smooth circulation, comfortable seating, and storage that actually gets used
In other words: the best island is the one that fits your room and your routines—not the one that looks biggest in a photo.
Start Here: Can You Fit a Kitchen Island?
Before you choose island dimensions, confirm the simple math of your space. If the required clearances can’t be met, a peninsula or a smaller “worktable-style” island may be a better fit.
Quick “island fit” checklist:
- Do you have enough width for an island plus clearances on both sides?
- Will appliance doors open without hitting stools or trapping someone?
- Can you maintain a comfortable walkway even when people are seated?
- Is the island going to improve workflow—or just add a centerpiece?
Kitchen Island Clearance Guide: The Numbers Homeowners Need
Clearance is the distance between the island and surrounding cabinets, counters, or walls. These ranges are widely used in kitchen planning and help ensure a kitchen feels functional, not cramped.
|
Walkway Clearance Ranges
Minimum workable: about 36 inches (tight, best for smaller kitchens or low traffic)
Comfortable daily use: about 42 inches (better for two people working) Busy kitchens / multiple cooks: about 48 inches (ideal for traffic + appliances) |
Where you need extra clearance
Some areas need more than the “typical” range because doors open and people pause there.
- Dishwasher zone: room for the door to drop down and someone to stand while loading
- Refrigerator zone: doors open wide; people linger while choosing food
- Oven zone: safety and heat—plus space to step back when pulling trays out
- Pantry zone: frequent in-and-out traffic, especially with kids
Rule of thumb: if a door opens into the aisle (dishwasher, fridge, oven), size your clearance toward the more comfortable end of the range.
Kitchen Island Dimensions: Depth, Length, and Height (Explained Simply)
Island depth: front-to-back
Depth depends on whether you have seating. A “storage-only” island can be much shallower than a “seating + storage” island.
Common island depth ranges:
- Storage only: about 24 inches (standard base cabinet depth)
- Storage + seating: often about 36–42 inches total, depending on overhang
- Two-sided storage (galley feel): can be deeper, but needs generous clearances
Island length: how long should it be?
Length is usually driven by seating count and storage needs. The key is to keep the island proportional to the room.
|
Typical Island Lengths
Small: about 48 inches (often 1–2 seats, light storage)
Medium: about 60–72 inches (often 2–3 seats, better prep space) Large: about 84+ inches (often 3–5 seats, multi-zone potential) |
Island height: counter or bar?
- Standard counter height: about 36 inches (most common today)
- Bar height: about 42 inches (less common; can block sightlines and feel dated)
Most homeowners prefer standard height because it supports prep, serving, and seating on one clean plane.
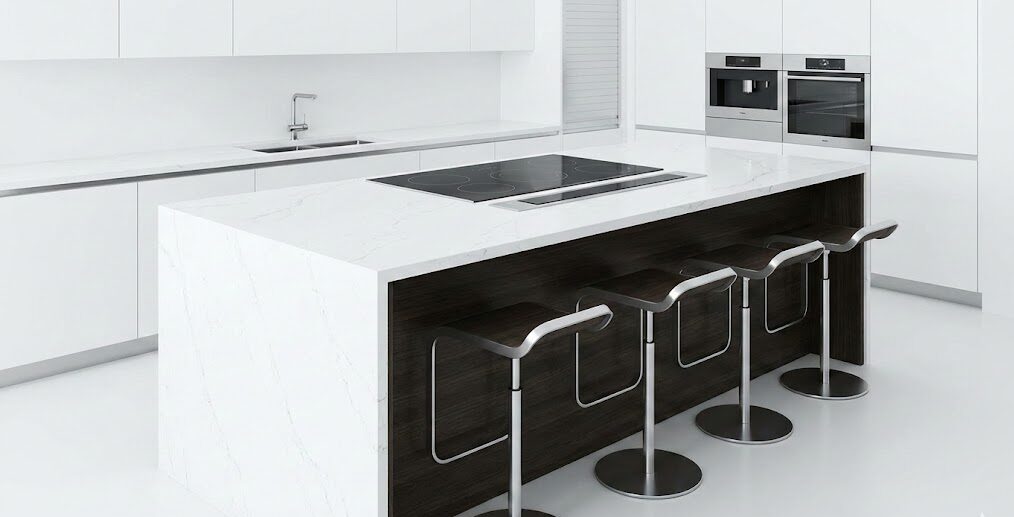
Island Seating Spacing: How Many Stools Can You Really Fit?
Island seating feels great when people can sit, eat, and chat without bumping elbows or blocking the kitchen. It feels terrible when stools are squeezed in like an airplane row.
Seating spacing guidelines (widely used ranges):
- Width per seat: about 24 inches minimum (30 inches for more elbow room)
- Overhang depth: about 12 inches (15 inches can feel better for adults)
- Knee clearance depth: about 15 inches minimum
- Space behind seated guests: about 36 inches minimum (more is better in busy kitchens)
Reality check: if you can “fit” four stools but only have tight clearance behind them, the kitchen will feel congested whenever anyone is seated.
Seating layout options
- One-sided seating: most common; keeps circulation on the working side
- Two-sided seating: requires a larger kitchen and stronger walkway planning
- Corner seating: can be efficient but needs careful knee-room planning
Should Your Island Have a Sink, Cooktop, or Dishwasher?
Adding utilities can make an island more functional—but it also adds complexity. The right choice depends on how you cook and how you want the kitchen to flow.
Great for prep and social cooking. Consider where dishes will go, how trash/recycling is handled, and how it affects seating.
Can work in larger kitchens, but ventilation and safety are major considerations. Plan ducting early.
Dishwasher doors can block aisles fast. Confirm clearances and unloading paths to dish storage.
Permits and inspections note: Electrical and plumbing changes (and some ventilation changes) may require permits and inspections depending on your city and project scope. Requirements vary—confirm with qualified professionals and local authorities.
Kitchen Island Storage Ideas That Make a Big Difference
Storage is often the reason an island becomes truly valuable. The best islands reduce clutter and shorten the time it takes to cook, clean, and put things away.
|
High-Impact Island Storage Upgrades
Deep drawers: for pots, pans, and stacks of plates (easier than base cabinets)
Pull-out trash & recycling: placed near prep to reduce mess Vertical tray storage: cutting boards, baking sheets, serving platters Microwave drawer: keeps counters clear (if it fits your workflow) Charging drawer: hides cords and keeps devices off the counter |
For cabinetry planning that supports real daily use, see Cabinets and Countertops.
Power + Lighting: The Island Details That Get Missed
Even a perfectly sized island can underperform if lighting and electrical planning are ignored. Islands often serve as both prep space and gathering space, which means you want light that is functional and warm.
- Task lighting: pendants or recessed lighting positioned to reduce shadows
- Ambient lighting: supports the whole room and keeps the island from feeling like a spotlight
- Outlets: requirements vary, but islands typically need accessible power for small appliances and charging
- Dimmers: turn a bright prep zone into a calm evening gathering space
For a homeowner-friendly overview, see Kitchen Lighting & Electrical Designed for Real Life.
Island Surface Choices: Durability Meets Daily Life
Your island top usually gets the most wear: meal prep, homework, serving, and daily clutter. Choose a surface that matches your household’s habits.
- High-use homes: prioritize durability and easy cleaning
- Bakers and cooks: prioritize prep space and comfortable edges
- Homes with kids: consider rounded corners and easy-maintenance finishes
Flooring matters too, because islands shape traffic. Learn more at Durable Kitchen Flooring & Surfaces Built to Last.
Common Kitchen Island Mistakes (and How to Avoid Them)
Most common island problems we see:
- “We sized it for stools, but now no one can walk behind them.” Confirm seating clearances before finalizing length.
- “The dishwasher blocks the aisle.” Plan appliance door swings and loading zones.
- “We don’t have enough prep space.” Make sure seating doesn’t consume your only usable counter run.
- “The island has storage, but it’s awkward.” Use drawers and pull-outs where possible.
- “Lighting feels harsh or shadowy.” Plan layers (task + ambient) and use dimmers.
- “We forced an island into a kitchen that needed a peninsula.” If clearances can’t work, rethink the concept.
Decision Checklist: Find Your “Right-Sized” Island
If you’re deciding between two sizes, use this checklist. A slightly smaller island with better clearances almost always wins.
-
Confirm the work aisles first
Mark the island footprint on the floor (painter’s tape works well) and walk the space with doors opening. -
Choose seating count based on comfort
Plan for elbow room and space behind stools—not just “how many can fit.” -
Assign storage by routine
Decide what will live in the island: cookware, trash, snacks, serving ware, small appliances. -
Coordinate power and lighting early
Confirm outlets, pendant placement, and dimming strategy before final plans are locked. -
Make sure the island supports your layout strategy
If your kitchen uses work zones, the island should strengthen them, not interrupt them.Related: Work Triangle vs. Work Zones: Which Kitchen Layout Works Best?
FAQs: Kitchen Island Sizing and Planning
How much space do I need for a kitchen island?
You’ll typically want enough room for the island plus clearances on all sides. Many kitchens aim for about 36–48 inches of clearance depending on traffic, appliances, and how many people use the kitchen. The more active the kitchen, the more clearance helps.
What is the best clearance around a kitchen island?
Many kitchen plans use about 42 inches for comfortable daily use, with more space preferred in busy kitchens or where appliances open into the aisle. If you’re working within a smaller footprint, tighter clearances may be possible—but they can feel congested during peak times.
How wide should island seating be per person?
A common planning guideline is about 24 inches per seat, with more width (around 30 inches) feeling more comfortable for adults. Don’t forget you also need space behind stools so people can walk through without squeezing.
Should I put a sink in the island?
An island sink can be great for prep and social cooking, but it affects seating, storage, plumbing, and where dishes and trash go. It works best when planned as part of a clear zone strategy (prep + clean) rather than added late.
Do islands need outlets?
Many projects require island outlets depending on layout and local rules. Requirements can vary by jurisdiction and project scope, so confirm specifics with qualified professionals and local authorities during design.
See Real Kitchen Islands in Utah Homes
If you want inspiration that’s grounded in real layouts (not just perfect studio photos), browse completed projects.
Related Planning Resources for Kitchen Remodels
These pages help you make decisions that affect island size and placement—especially if you’re trying to avoid change orders later.
Want a Pro Layout Check Before You Finalize Your Island?
A kitchen island should make your kitchen feel bigger, calmer, and more usable—not tighter. The Fortress Builders starts with a detailed design blueprint that aligns layout, clearances, storage, and utilities before construction begins.
Request a Design Consult Explore Kitchen Remodeling
If you’re deciding between two island sizes or debating seating vs. storage, we’ll help you choose the option that fits your home—and supports daily life in Utah.
Key Takeaways
A Great Island Starts With Clearances, Not Pinterest
- Plan clearances first, especially near dishwashers, ovens, fridges, and pantries.
- Give seating enough width and space behind stools to keep walkways comfortable.
- Use drawers and pull-outs so island storage is easy to access and actually used.
- Coordinate outlets and lighting early—requirements and best practices can vary by project.
- If the math doesn’t work, choose a better layout (peninsula, smaller island, or no island).