

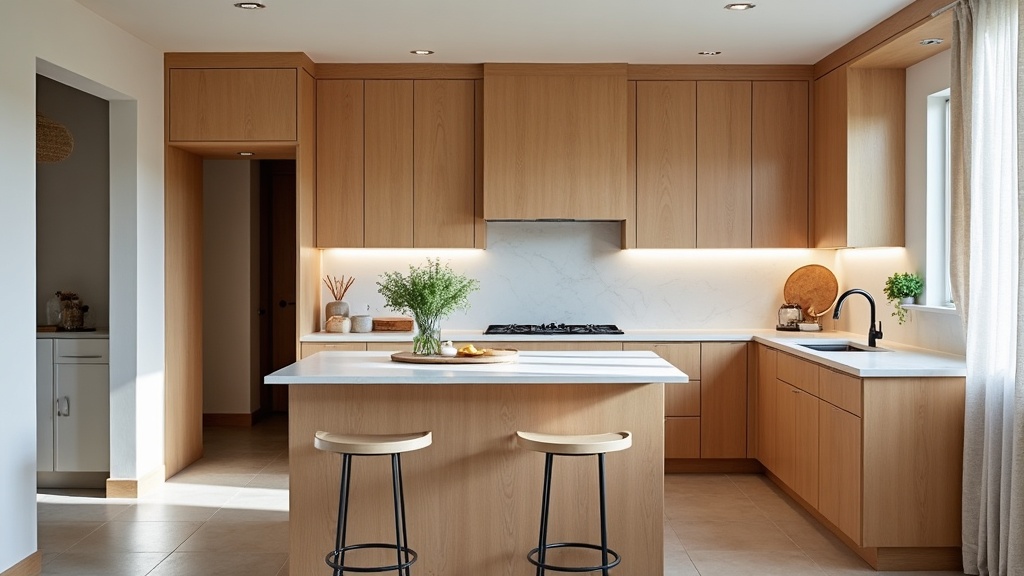
The layout needs to come first, because traffic, work aisles, appliance doors, storage, ventilation, and task lighting all depend on where the major elements land. For anyone researching kitchen layout design in Utah—especially in Davis and Weber Counties—the best early decision is not a finish. It is deciding how the room needs to work on an ordinary Tuesday.
We start with the daily problem you want solved, then test traffic, cooking, cleanup, seating, and appliance placement before the cabinet plan becomes fixed. That sequence gives every later choice a reason. It also helps you see when a beautiful idea is going to create a real-life layout problem.
- Write down the first workflow problem the remodel needs to solve.
- Trace normal paths through the room before drawing an island.
- Place the sink, cooking surface, refrigerator, and dishwasher around real routines.
- Test seating, appliance doors, landing areas, and more than one cook.
- Build storage, cabinetry, lighting, and surfaces around the approved layout.
Why Should the Layout Come Before Cabinets, Appliances, and Lighting?
A finish can be changed on paper without changing the way the room works. A layout decision is different. Move an island a few inches, change the refrigerator width, add stools, or relocate the sink, and several other decisions may need to move with it.
Cabinet dimensions depend on appliance dimensions. Appliance locations affect electrical, plumbing, gas, and ventilation coordination. Island size affects work aisles, seating clearances, pendant locations, and how people move between the kitchen and the rest of your home. Countertop seams, overhangs, and usable prep areas follow the cabinet plan. That is why we treat design and layout as the load-bearing part of the conversation.
This does not mean every kitchen needs a complete reconfiguration. Sometimes the honest answer is that the existing footprint works, but a few relationships do not. The refrigerator may open into a passage. The dishwasher may block the sink when it is down. The pantry may sit between the sink and the range. An island may be just large enough to look useful but too large for the room around it.
Before you shop, decide what the plan must accomplish. Do you need two people to cook without colliding? A direct grocery route from the garage? A place for children to sit without occupying a work aisle? Better landing space beside the refrigerator? A real prep surface near the sink? Each answer gives the layout a job.
Early planning cannot guarantee a fixed price or completion date. It can, however, reveal which ideas keep the existing scope relatively contained and which ideas require more coordination. That distinction matters before you commit to cabinetry or appliances that only fit one version of the room.
What Daily Frustrations Should You Map Before Anyone Draws the Kitchen?
Start with what is bothering you now. Not what you dislike in a photograph. What slows you down in the room you actually use?
For a Davis County kitchen design or a Weber County kitchen remodel, we’d ask you to walk through one ordinary morning and one ordinary dinner. Notice where people stop, wait, turn, reach, and cross paths. That is more useful than beginning with a style label.
Write down the friction as an action
“The kitchen feels small” is hard to design around. “Two people cannot pass when the dishwasher is open” is specific. “Groceries land on the cooktop because there is no counter beside the refrigerator” is specific. “Everyone crosses behind the stools to reach the backyard” is specific.
Useful notes often sound like this:
- You unload groceries through the garage and cross the cooking zone to reach the refrigerator or pantry.
- You prep beside the cooktop because the counter near the sink is broken into small pieces.
- You need the refrigerator accessible to children or guests without sending them through active cooking space.
- You open the dishwasher and lose access to a cabinet, walkway, or the standing space at the sink.
- You use the island for homework, meals, mail, serving, and prep, but those uses compete with each other.
- You have enough cabinets in total, yet everyday items are stored far from where you use them.
Take one photo from each corner of the kitchen. Then take a few close photos of the problem areas: an open appliance door, the garage-entry route, the space behind the stools, and the counter where groceries usually land. Those photos give a kitchen remodel conversation a practical starting point.
Map who uses the room, not just who cooks
A kitchen layout has to account for more than the person at the range. Someone may be making coffee while another person cleans up. Children may reach the refrigerator. A guest may stand near the island. A pet may settle in the narrowest passage. Someone may enter from the garage while a cabinet or dishwasher door is open.
Draw those paths on a simple floor plan, or use painter’s tape on the floor. Mark the route from the garage to the refrigerator, from the sink to the table, from the pantry to the prep area, and from the kitchen to the backyard. When a major route cuts directly through the work area, the plan needs another look.
How Do Traffic Paths Change the Kitchen Work Triangle or Work Zones?
The kitchen work triangle is still a useful planning check, but it is not a rule that solves every kitchen. It looks at the relationship among the sink, cooking surface, and refrigerator. That can work well for one primary cook in a straightforward plan. It becomes less complete when you add a large island, a second sink, multiple cooks, a separate beverage area, or frequent traffic through the room.
The NKBA Kitchen Planning Guidelines recommend triangle legs between 4 and 9 feet, with the three legs totaling no more than 26 feet. NKBA also recommends that major traffic patterns not cross the basic triangle and that a full-height, full-depth obstacle not separate two primary work centers. These are planning recommendations, not local code and not a guarantee that one arrangement fits every household.
In a more complex room, we shift from a single triangle to work zones. A prep zone needs a useful counter near water, tools, and ingredients. A cooking zone needs the cooking surface, landing space, utensils, and the items you reach for while cooking. A cleanup zone needs the sink, dishwasher, waste, dish storage, and enough standing room for an open dishwasher door. A beverage or breakfast zone can keep frequent refrigerator and pantry traffic away from the primary cook.
Source basis: the planning checks below come from the National Kitchen & Bath Association. Appliance-efficiency screening uses U.S. Department of Energy guidance, and contractor verification uses Utah’s Division of Professional Licensing. These sources support planning; they do not replace field measurements, manufacturer instructions, or project-specific requirements.
| Planning check | NKBA recommendation | What to test in your kitchen |
|---|---|---|
| Work triangle | Each leg 4–9 feet; no more than 26 feet total | Whether sink, cooking, and refrigeration connect without an obstacle or long detour |
| Work aisle | At least 42 inches for one cook; 48 inches for multiple cooks | Clearance between opposing counters, tall cabinets, and appliances |
| Walkway | At least 36 inches | A passage that is not an active work aisle |
| Traffic behind seating | 32 inches with no passing; 36 inches to edge past; 44 inches to walk past | Whether stools pinch a wall, doorway, table, or traffic route |
| Sink landing area | At least 24 inches on one side and 18 inches on the other | Where dishes, produce, and cookware can land |
| Primary prep area | At least 36 inches wide by 24 inches deep immediately next to a sink | Whether there is one continuous prep surface |
| Refrigerator landing | At least 15 inches on the handle side, beside a side-by-side, or within 48 inches across from it | Where groceries land with the door open |
| Cooking-surface landing | At least 12 inches on one side and 15 inches on the other; 9 inches behind an island or peninsula cooking surface | Counter near hot cookware and island seating |
Measure the room, but also test it. Open the refrigerator, dishwasher, oven, and nearby drawers. Stand where a second cook would stand. Pull a chair or temporary stool into the proposed seating zone. Dimensions are most useful when you connect them to actual movement.
Will an Island Improve the Kitchen—or Crowd the Work Aisles and Seating?
An island is not automatically an upgrade. It has to earn its floor space.
A good kitchen island layout may add prep room, storage, seating, a sink, or a cooking surface. A poor one can narrow the work aisles, block appliance doors, push stools into a major passage, or create a wide barrier between the sink and refrigerator. The question is not, “How large an island can fit?” It is, “What jobs should the island do, and what space does each job need around it?”
Choose the island’s job before its size
If the island is mainly for prep, it needs a strong relationship to the sink, refrigerator, and cooking zone. If it is mainly for seating, the traffic behind the stools matters as much as the overhang. If it holds the sink or cooktop, appliance doors, landing areas, ventilation, electrical, and cleanup all become part of the island plan.
Test the floor area before you commit
Use painter’s tape to outline the proposed island. Add the countertop overhang, not just the cabinet box. Place stools inside the taped area. Then mark the recommended work aisles and the traffic area behind the seats. Open every nearby appliance and door.
Live with that outline for a few days. Carry groceries through it. Prepare a meal. Ask someone to sit where the stools would be while another person uses the refrigerator. This simple test can reveal more than a pretty rendering.
Sometimes a peninsula provides the same storage or seating with fewer circulation conflicts. Sometimes a table gives the room more flexibility. Sometimes keeping the center open is the function-first choice. When you review completed kitchen projects, look past the cabinet color and ask how each layout keeps work, seating, and traffic from competing.
Island
Best when the room can support work aisles on all active sides and the island has a clear job.
Peninsula
Worth considering when you need a work surface or seating but one open edge can simplify circulation.
Table
Useful when flexible seating matters more than fixed storage or built-in appliances.
Open floor area
The right answer when circulation, multiple cooks, or appliance access matters more than filling the center.
Which Appliance and Ventilation Decisions Need to Be Fixed Before Cabinet Plans?
Cabinet drawings should not rely on a generic “standard refrigerator” or “typical range.” Exact models matter. Width is only the beginning.
Door swing, handle depth, hinge clearance, installation space, utilities, and ventilation can all affect the cabinetry. An appliance may fit its opening yet still block a wall, walkway, or standing area when the door opens.
That is why the appliance and ventilation plan needs to move in step with the cabinet plan. We recommend collecting model numbers and installation documents before final cabinet dimensions, appliance panels, fillers, outlets, gas locations, and duct paths are treated as settled.
Place appliances around use, not symmetry alone
If the kitchen has one sink, NKBA recommends locating it adjacent to or across from the cooking surface and refrigerator. That relationship supports prep, cooking, and cleanup without forcing long back-and-forth travel.
The refrigerator also needs a landing area. NKBA recommends at least 15 inches on the handle side, beside either side of a side-by-side model, or within 48 inches across from the front. Without that space, groceries and containers tend to land wherever there is room, which may be the cooktop or the main prep area.
At the cooking surface, NKBA recommends at least 12 inches of landing area on one side and 15 inches on the other. For a cooking surface on an island or peninsula, it also recommends at least 9 inches of counter behind it. These are planning checks, not permission to ignore the selected appliance instructions or local requirements.
Keep efficiency as a selection question, not a layout substitute
The U.S. Department of Energy’s kitchen-appliance guidance identifies ENERGY STAR as one way to screen for more-efficient models. That can be part of product selection, but efficiency does not solve a poor fit. The appliance still has to work with the cabinet opening, door swing, landing area, power, water, gas, and ventilation plan.
Do not select a hood only by how it looks in an elevation. Confirm the cooking appliance, the manufacturer’s requirements, the duct route, the cabinet or ceiling conditions, and any project-specific mechanical considerations. We would not use a generic airflow number from an article as a substitute for that review.
How Should Storage, Landing Space, and Prep Zones Shape the Cabinet Plan?
More cabinet footage does not automatically create better storage. What matters is whether the right items are stored near the task that uses them.
Before the cabinets and countertops are finalized, sort what you store into real-life zones:
- Prep: knives, cutting boards, mixing bowls, oils, spices, and frequently used ingredients.
- Cooking: pots, pans, utensils, sheet pans, and the items you reach for while the cooking surface is active.
- Cleanup: dishes, glasses, dishwasher supplies, waste, recycling, and towels.
- Pantry: dry goods, snacks, bulk items, and backup supplies.
- Breakfast or beverage: mugs, coffee equipment, cereal, toaster, and refrigerator access that does not interrupt the primary cook.
- Serving and gathering: platters, napkins, seasonal pieces, and anything used near the table or island seating.
Then inventory the awkward items. Stand mixer. Air fryer. Large stockpot. Pet food. Lunch containers. Reusable bottles. Cleaning tools. Small appliances that live on the counter because lifting them from a low shelf is inconvenient. A function-first cabinet plan gives those items an intentional home.
Protect one real prep surface
NKBA recommends a continuous primary prep area at least 36 inches wide by 24 inches deep immediately next to a sink. The word “continuous” matters. Three small sections of counter do not perform like one clear work area.
The sink also needs usable landing space: at least 24 inches on one side and 18 inches on the other under NKBA’s recommendation. Think about how you wash produce, stack dishes, set down a hot pan, or move food from prep to cooking. The landing areas should support those motions instead of becoming decorative gaps.
Check doors and drawers in the open position
A cabinet plan can look balanced when everything is closed and still fail during use. Open the corner cabinet, dishwasher, oven, refrigerator, waste pullout, and the drawers across from each other. Ask whether one open element blocks another, traps a person, or removes the standing space needed for the task.
Storage decisions also affect lighting. A tall pantry can shade a counter. Open shelves may change where task lights make sense. A cabinet above a coffee station may affect appliance clearance. That is why cabinetry should not be approved as an isolated drawing.
How Should Lighting and Electrical Follow the Real-Life Layout?
Lighting is easier to plan after the work zones are clear. Before that, you are placing fixtures over an idea of the kitchen instead of the kitchen you will actually use.
The lighting and electrical plan should respond to the cabinet layout, ceiling conditions, island location, seating, sink, cooking surface, prep zones, and appliance power needs. That does not mean every answer must be decorative or complicated. It means each layer should have a job.
Plan light by task
Start with the surfaces where you cut, read labels, wash dishes, and cook. A centered ceiling fixture may brighten the room while leaving your body between the light and the counter. Task lighting needs to reach the work surface without creating that shadow.
Then consider the room’s general light and evening use. The island may need focused light for prep and softer light for meals. The cleanup zone may need clear task light even when the rest of the room is dimmer. The route through the kitchen should remain easy to read without turning on every fixture.
Let the approved island control the pendants
Pendants should follow the final island length, overhang, sink or cooking-surface location, and seating pattern. Choosing fixtures first can pressure the layout to fit a decorative plan that no longer makes sense.
Electrical planning also depends on the exact appliance list. A wall oven, microwave location, beverage refrigerator, disposal, dishwasher, and small-appliance zone may each affect rough-in. We would not publish generic circuit or outlet-spacing numbers for a specific kitchen. Those details need project-specific verification.
The practical check is simple: on the final plan, point to every place you will prep, cook, clean, charge, plug in a small appliance, and control the lights. If any answer is “we will figure it out later,” the plan is not ready for rough-in.
How Do Layout Changes Broaden Scope and Coordination Without Assuming a Cost or Timeline?
Some layout changes stay mostly within the existing footprint. Others touch plumbing, electrical, gas, ventilation, windows, doors, or structure. That does not make them wrong. It means they need a clearer scope before anyone treats a cabinet drawing as final.
Moving a refrigerator may change an outlet and water-line location. Moving a sink may affect supply, drainage, venting, the window relationship, and the cleanup zone. Moving a cooking surface may change the ventilation path and utility plan. Removing or changing a wall requires investigation before anyone calls it practical or structurally appropriate.
We cannot tell you from a general article what those changes will cost, how long they will take, whether a wall can be altered, or what a specific city will approve. The honest answer comes from the home, the selected products, the proposed plan, and the authority with jurisdiction.
Keep local permit language specific
Davis and Weber Counties include multiple city jurisdictions. Kaysville lists remodels and electrical, mechanical, or plumbing work among permit-required projects. Layton addresses home finishing and remodeling, Farmington addresses renovations and trade systems, and Ogden issues permits and inspects remodels.
Those examples do not create one countywide answer for every address. Before you rely on a final scope, verify the work with the city or authority that has jurisdiction over your home. Do not assume that keeping walls in place means no permit is involved, and do not assume that a broad remodel label tells you which reviews apply.
Contractor verification is separate from layout design, but it belongs in responsible planning. The Utah Division of Professional Licensing provides the official state starting point for contractor licensing and verification resources. Use the official system rather than relying on a marketing statement.
Use sequence to create a clear scope
Name the first problem. Choose the daily workflow issue the remodel must solve before adding features.
Document the room. Measure walls, openings, ceiling conditions, utilities, and the routes people use.
Map work and traffic. Test the triangle, work zones, open appliance doors, and more than one cook.
Choose the island direction. Decide whether an island, peninsula, table, or open center best supports the room.
Confirm appliances. Use exact model specifications before cabinet openings and utility locations become final.
Build storage and lighting around use. Protect prep, landing, cleanup, cooking, and task-lighting zones.
Verify the scope. Confirm project-specific permit, structural, mechanical, electrical, and manufacturer requirements before construction.
That order does not remove every unknown. Remodeling still involves existing conditions, product decisions, and field verification. What it does is keep the conversation grounded. You know what the layout is trying to accomplish, which decisions are fixed, which remain flexible, and where more investigation is needed.
What Should You Bring to a Kitchen Design Consult?
You do not need a finished plan. In fact, bringing a rigid plan too early can make it harder to see a better option. Bring useful evidence instead.
- One photo from each corner of the kitchen.
- Close photos of appliance doors, tight walkways, island seating, garage entry, and problem cabinets.
- The first daily workflow problem you want solved.
- A list of who cooks, who passes through, and what happens during busy times.
- Any appliance model numbers already under serious consideration.
- Your must-haves, your flexible preferences, and the features you are unsure about.
- Questions about keeping the existing footprint versus moving utilities, openings, or walls.
Across 26+ years in residential construction, we have learned that the most productive first conversation is not about proving that an idea is right. It is about testing the idea against the home and the way you live. The goal is clearer priorities, not more pressure.
Frequently Asked Questions
Is the kitchen work triangle still useful when you have an island or more than one cook?
Yes, as a planning check for the sink, cooking surface, and refrigerator. With multiple cooks, a large island, or extra work centers, also map task zones and traffic. Daily use should control the final plan.
How much space should you leave around a kitchen island?
NKBA recommends at least 42 inches for a one-cook work aisle, 48 inches for multiple cooks, and 36 inches for a walkway. Use those as planning checks, then verify doors, seating, accessibility needs, and project requirements.
How much room should be behind island seating?
NKBA recommends 32 inches with no passing, 36 inches to edge past, and 44 inches to walk past. Test the actual wall, doorway, table, appliance, or family route behind the stools.
Should you choose appliances before cabinets are finalized?
Confirm exact appliance models before final cabinet openings and utility locations. Check dimensions, door swings, clearances, installation instructions, ventilation, and power or plumbing needs. A generic width is not enough.
Can you improve a kitchen layout without moving the sink or other utilities?
Sometimes. Storage, appliance relationships, a peninsula, a smaller island, door clearances, or work zones may improve function within the footprint. The answer depends on the room, utilities, selected appliances, and your first problem to solve.
When might a kitchen remodel need a permit in Davis or Weber County?
The answer is jurisdiction-specific. Kaysville, Layton, Farmington, Ogden, and other local jurisdictions maintain their own permitting information. Confirm the exact scope with the authority that has jurisdiction over your address.
Ready to talk through scope and timeline?
A design consult is the right first step. For a kitchen in Davis County or Weber County, share one photo from each corner and the daily workflow problem you want solved first. We can help you test whether the current layout can be improved without overcomplicating the remodel.
Call (801) 580-3522