
Whole home remodel sequencing: the remodel order of operations that prevents rework
Whole-Home Remodel Sequencing: The Order That Saves Time and Rework
A whole-home remodel isn’t just “a lot of projects happening at once.” It’s a system. And like any system, outcomes depend on sequence.
This whole home remodel sequencing guide explains the most common remodel order of operations professionals use to keep trades from colliding, to protect finished work from damage, and to reduce the kind of rework that quietly drains budgets.
In this guide, you’ll learn:
- how to map renovation timeline phases into a practical, written sequence,
- why planning + permits are a real “phase,” not a formality,
- the safest order for demo, structural work, and rough-ins,
- how to time drywall, floors, cabinets, and paint so they don’t fight each other,
- how to avoid the most common “redo” moments in a whole-house remodel,
- and which milestones you should ask for before you sign a contract.
The Fortress Builders is a Utah-based design–build company built on one principle: strength through structure. That means your remodel is planned like a blueprint-led build—scope, sequencing, permitting, and trade coordination are handled up front so the construction phase runs clean and predictable.
Helpful pages while you plan:
Sequencing is how pros save time and money—without cutting corners
Homeowners often assume the biggest risks in a whole-house remodel are “materials” or “style decisions.” Those matter, but the most expensive problems usually come from a more basic cause: the wrong work happened at the wrong time.
That’s what sequencing solves. When the order is right, trades aren’t stepping on each other, inspections happen on time, and finished work stays protected. When the order is wrong, you get issues like:
- new floors getting scratched during heavy demo or framing,
- cabinets installed before walls are truly flat and finished,
- paint redone because dust-heavy work wasn’t finished,
- tile torn out because plumbing rough-ins weren’t finalized,
- lighting moved after drywall because furniture layout wasn’t confirmed.
Core idea: A good renovation timeline is not “calendar dates.” It’s an order of operations with clear milestones that protect work quality.
Phase 0: Whole house remodel planning (the “invisible” phase that prevents chaos)
Before demolition begins, professionals lock decisions that drive everything downstream: layouts, plumbing locations, electrical plans, ventilation, and the finish schedule. This is the phase that keeps your remodel from becoming a string of change orders.
What should be decided before demo?
- Room-by-room scope: what changes in each area, and what stays.
- Layout confirmations: door swings, wall moves, circulation, furniture placement.
- Plumbing plan: wet walls, fixture locations, rough-in feasibility (especially in basements).
- Electrical + lighting plan: outlet locations, switching, layered lighting, special circuits.
- HVAC and ventilation approach: comfort, humidity, and return-air planning if you’re altering layouts.
- Finish selections that affect lead time: windows, doors, cabinets, tile, specialty lighting, plumbing fixtures.
If your remodel includes a kitchen, it helps to map workflow early using resources like:
Homeowner decision tip: Ask for a written sequence and milestone schedule before construction starts. If a contractor can’t articulate “what happens when,” you’re likely to feel the project as chaos.
Phase 1: Permits, approvals, and early ordering
Permits and inspections aren’t just paperwork—they are timeline gates. If your project requires permits, inspections will also require the project to reach certain milestones before work can proceed (especially behind-wall systems like electrical and plumbing).
If you’re unsure how permits fit into a schedule, start here: Permits and Inspections for Basement Finishing. Even if your scope is not a basement, the inspection logic is similar: rough-ins first, then close-up work, then final.
Ordering strategy (so trades don’t idle)
- Long-lead items early: cabinets, windows, doors, specialty fixtures, custom materials.
- Confirm rough dimensions: window sizes, appliance specs, vanity sizes before framing and rough-ins.
- Lock “utility-driven” decisions: plumbing fixture locations and ventilation routes before drywall.
Phase 2: Demolition (strategic demo beats “rip everything out”)
Demolition is where most remodels either gain momentum—or create mess and regret. Strategic demo protects what stays, preserves reference points for layout, and avoids damaging systems you still need (especially if you’re living at home during the remodel).
What demo should accomplish
- Expose reality: structure, wiring, plumbing, and conditions behind walls.
- Confirm feasibility: can the plan work with what’s actually there?
- Set up clean rough-in work: open access for electrical, plumbing, and HVAC changes.
How to reduce rework during demo
- Confirm layout lines first: mark where new walls and openings will land.
- Protect what stays: floors, stairs, windows, and mechanical equipment.
- Plan debris paths: reduce dust spread and accidental damage.
If you’ll be living in the home, review: Living at Home During a Remodel.
Phase 3: Structural work and “invisible” corrections
Once demo reveals what’s behind the walls, structural work happens before anything else gets rebuilt. This can include beams, posts, floor corrections, framing changes, or addressing issues like water intrusion and moisture risk.
Examples of “structural-first” tasks
- removing or altering walls (with proper engineering where needed),
- correcting subfloor issues,
- reinforcing openings for new doors/windows,
- addressing basement moisture concerns before finishing below grade.
If your remodel includes basement finishing, moisture planning should be handled early, not after drywall. Start with:
Rule: Structural and moisture corrections happen before finishes, every time. Otherwise, you’re finishing over risk.
Phase 4: Rough-ins (MEP) — the most important coordination stage
Rough-ins are where plumbing, electrical, and mechanical systems get installed before insulation and drywall. This is where whole-home remodels win or lose efficiency, because multiple trades are in the home at the same time—and their work overlaps.
What “good rough-in coordination” looks like
- Room-by-room rough-in plan: outlets, lighting, plumbing, vents, returns, switches.
- Clear trade sequencing: who goes first, who follows, and where handoffs occur.
- Future furniture awareness: outlet placement, sconce heights, TV locations, vanity lighting—planned around real use.
Examples of rough-in decisions that prevent rework
- Kitchen ventilation and make-up air: if you’re upgrading a hood, plan ducting and air balance early. See Range Hood CFM Sizing and Make-Up Air in a Kitchen Remodel.
- Built-in appliance planning: avoid clearance and panel issues by planning appliance specs before cabinets. See Built-In Appliances Layout Tips.
- Bathroom ventilation: keep moisture under control with correct fan sizing and duct routing. See Bathroom Vent Fan Sizing.
- Basement HVAC comfort: returns and humidity control should be designed, not guessed. See Basement HVAC & Ventilation Planning.
Phase 5: Inspections (the gate before you close walls)
If permits apply, inspections usually occur after rough-ins and before drywall. This is not the time to be “almost done.” A predictable schedule includes inspection buffers and clear access to the work.
Related: Permits and Inspections for Basement Finishing (inspection logic is similar across remodel types, even when scope differs).
Homeowner tip: Ask who schedules inspections and how they’re tracked. If you don’t know when inspections are happening, you also won’t know why the project is paused.
Phase 6: Insulation, air sealing, and prep for drywall
Before drywall goes up, the home should be ready to become “finish space.” That means insulation is installed (where needed), gaps are sealed, and mechanical/ventilation pathways are complete.
Especially in basements, insulation strategy intersects with comfort and moisture control. See Basement Insulation Basics for Comfort and Sound Control.
Phase 7: Drywall, mudding, sanding (dust-heavy work happens before “nice things”)
Drywall finishing is one of the dustiest phases of any remodel. This is why professionals avoid installing sensitive finishes too early.
Sequencing rules that prevent damage
- Protect mechanical access: don’t bury critical shutoffs or clean-outs.
- Expect curing time: mudding and sanding need time; rushing creates surface issues.
- Plan for lighting: lighting reveals drywall imperfections—final light placement matters.
Simple truth: If you install finished floors or cabinetry before the dust-heavy phases are complete (or contained), you’ll pay for it—either in damage or re-cleaning and touchups.
Phase 8: Prime, paint, and “first finish pass”
Painting often happens in multiple passes in a whole-home remodel. A common professional approach is:
- Prime + initial paint: after drywall is finished and surfaces are prepped.
- Trim and built-ins installed: then caulk and touch up.
- Final paint and detail work: near the end after heavy installs are complete.
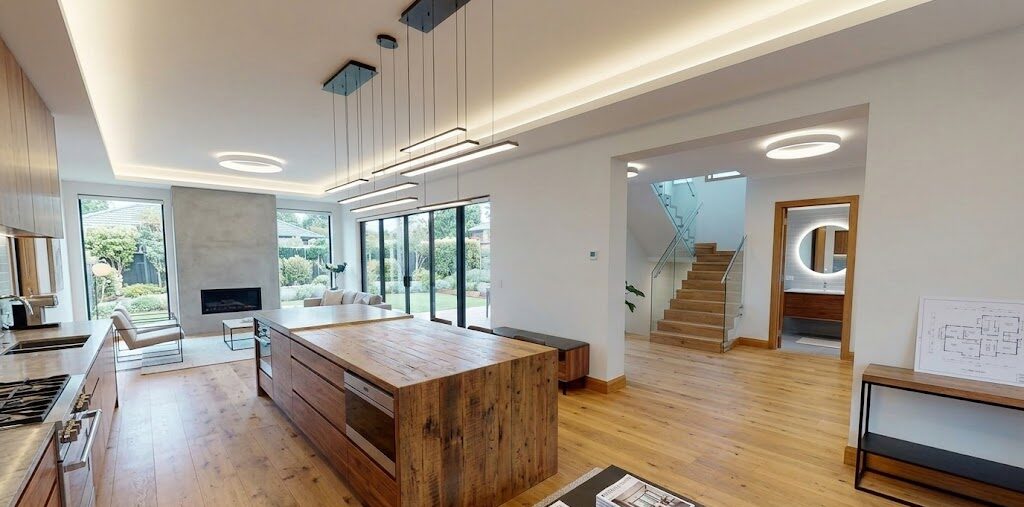
Phase 9: Floors, cabinets, and hard installs (the “precision phase”)
Once the home is clean enough and dust-heavy work is behind you, major hard installs can happen with far less risk. This phase typically includes flooring, cabinets, countertops, and built-ins.
Flooring considerations (sequencing perspective)
- Protect finished floors: after install, trades should use floor protection.
- Coordinate with cabinets: some floors run under cabinets; some stop at toe kicks—this is a design/build decision that affects timeline and material takeoff.
- Allow acclimation time: many flooring products require acclimation to the home environment.
Kitchen floors and surfaces planning: Durable Kitchen Flooring for Utah Homes.
Cabinet and countertop sequencing
- Cabinets first, then counters: counters rely on exact cabinet installation and leveling.
- Appliances coordinated: built-ins, wall ovens, and panels require correct clearances. See Built-In Appliances.
- Hardware last: avoid scratches and keep alignment consistent. See Cabinet Hardware Placement.
Phase 10: Trim, doors, and finish carpentry
Finish carpentry is where the home starts to feel “done.” This is also where small inconsistencies become visible—so quality control matters.
What belongs in finish carpentry
- interior doors and casing,
- baseboards and detailed trim,
- built-ins and custom carpentry,
- final caulking and precision detail work.
If your remodel includes built-ins or custom carpentry, see: Custom Carpentry & Built-Ins.
Phase 11: Final electrical, plumbing, and mechanical “trim-out”
Trim-out is when fixtures go in: outlets and cover plates, lighting fixtures, faucets, toilets, vents, thermostats, and final mechanical components.
How to avoid last-minute rework during trim-out
- Confirm fixture specs early: especially lighting and plumbing fixtures that affect rough-in placement.
- Match lighting to use: bathrooms need different lighting than hallways or theaters. See Bathroom Lighting Plan.
- Ventilation final checks: fans should vent correctly, and comfort should be verified. See Basement HVAC & Ventilation.
Phase 12: Punch list, commissioning, and closeout (where pros protect the “last 5%”)
The last 5% of a remodel is where homes either feel premium—or feel rushed. Punch lists exist because complex projects naturally have small fixes and adjustments. The key is to plan them into the schedule, not treat them as an inconvenience.
Typical punch list categories
- paint touchups and caulk lines,
- door and cabinet adjustments,
- hardware alignment and finishing details,
- final cleaning and site protection removal,
- system checks (HVAC balancing, ventilation verification, fixture testing).
Homeowner tip: Ask how punch lists are managed: who documents them, how they’re prioritized, and what “substantial completion” means in the contract.
Common sequencing mistakes (and what to do instead)
Mistake 1: Selecting finishes too late
If tile, fixtures, cabinets, or lighting are selected late, rough-ins get delayed or guessed. Then walls get opened and work gets redone. Fix: lock utility-driven selections early and document them.
Mistake 2: Flooring installed before dust-heavy phases are controlled
Drywall sanding dust and ongoing trade work can ruin new floors. Fix: install floors after major dust phases and use protection during remaining work.
Mistake 3: Cabinets installed before surfaces are truly ready
Cabinets need flat, finished surfaces and predictable dimensions. Fix: finish drywall properly, prime/paint as needed, and confirm measurements before install.
Mistake 4: “We’ll figure it out in the field” for lighting and outlets
Field decisions are expensive once drywall is up. Fix: confirm furniture layout, TV walls, vanity mirror sizes, and task zones early.
Mistake 5: No written milestones
Without milestones, homeowners don’t know what “done” means at each phase—and trades can drift. Fix: demand a written sequence and a milestone checklist.
Best question to ask any remodeler: “Can you show me your sequence—phase by phase—and the inspections/milestones that control it?”
Conclusion: the right remodel order of operations makes the whole project feel calmer
Whole-home remodel sequencing is the hidden difference between “we survived it” and “it went surprisingly smoothly.” When the order is right, your home is protected, trades aren’t colliding, and quality improves because work isn’t rushed or redone.
The most homeowner-friendly remodels are the ones with a clear plan, clear milestones, and a disciplined sequence. That’s what reduces rework—and protects both your time and your investment.
Planning a whole-home remodel in Davis or Weber County?
The Fortress Builders builds with blueprint-level sequencing and high-touch project coordination—so your remodel runs clean, predictable, and built-to-last from the first demo day to the final punch list.
Request a Design Consult Explore Whole-Home Remodels View Whole-Home Portfolio
Bring your goals, priority rooms, and any constraints (timing, budget, living-at-home needs). We’ll help map a realistic sequence and milestone plan before construction begins.