
Wet Bar Design 101: Plumbing, Electrical, and Easy-Clean Materials
Wet Bar Design 101: Plumbing, Electrical, and Easy-Clean Materials
A wet bar should make hosting easier—not messier. Done well, it becomes the “support station” for game nights, movie marathons, and family gatherings. Done poorly, it becomes a clutter magnet with awkward outlets, splash-prone surfaces, and a sink that’s hard to use.
This homeowner-friendly guide covers wet bar design 101, with a focus on wet bar plumbing planning, wet bar electrical outlets, and basement bar materials easy clean choices that hold up to real life. You’ll also get practical wet bar layout tips you can use before cabinet drawings are finalized.
In this guide, you’ll learn:
- how to define the bar’s purpose (so you don’t overbuild or underbuild),
- layout + workflow decisions that reduce clutter and spills,
- sink, drain, venting, and water line considerations for basements,
- how to plan outlets, lighting, and appliance power without regrets,
- easy-clean surface and backsplash options that stay looking sharp,
- storage details that keep glassware, trash, and supplies organized,
- and a coordination checklist to review before rough-ins and cabinets are ordered.
The Fortress Builders is a Utah design–build company built on “strength through structure.” That means utility planning (plumbing/electrical/venting), layout, and finishes are coordinated early—so the bar looks great and works cleanly for years.
Helpful internal pages while you plan:
A wet bar works best when utilities are planned before the pretty stuff
Most wet bars fail for one reason: they’re designed like furniture instead of a small utility zone. A bar has the same “behind-the-scenes” needs as a kitchenette—water, drainage, power, lighting, and surfaces that tolerate spills. When those needs are handled first, the visible design becomes easy.
Think of your wet bar as a three-part system:
- Utilities: water, drain, venting, electrical circuits, and appliance power.
- Workflow: where you rinse, pour, prep, store, and toss trash.
- Materials: surfaces and finishes that stay clean and durable.
Core principle: A bar is a “spill-friendly” station. Plan it like a mini kitchen, not a console table.
Step 1: Define how you’ll use the bar (so the layout matches reality)
The right bar for you depends on one question: what do you want the bar to do on your busiest day? A “movie night bar” looks different from a “host 20 people” bar, and both look different from a “coffee + hydration station” bar.
Common wet bar use types
- Drinks-only bar: sink + ice + glassware storage, minimal prep.
- Snack-and-drinks bar: add a microwave, small prep area, and more outlets.
- Entertaining hub: beverage fridge, ice maker, dishwasher drawer (optional), more counter landing space, better lighting.
- Basement apartment support: often blends into kitchenette planning—see Basement Kitchenette Planning.
Fast planning prompt: Choose your “must-have trio.”
- Sink + trash + glassware
- Fridge + ice + prep space
- Coffee + filtered water + storage
- Microwave + snack drawers + kid-friendly access
Step 2: Wet bar layout tips that reduce clutter and spills
A bar feels effortless when it has clear landing zones. Without those zones, you’ll end up stacking items around the sink or blocking appliance doors.
Minimum zones to plan
- Pour / serve zone: a clear counter stretch for pouring and staging glasses.
- Rinse / cleanup zone: sink + drying space, with trash close by.
- Cold storage zone: beverage fridge/ice maker where doors can open cleanly.
- Storage zone: glassware, bottles, bar tools, paper towels, and backup supplies.
Bar workflow that “feels right”
When possible, arrange the bar so the most common steps are in a short sequence:
- open fridge → grab drink/ice → pour/serve → quick rinse → trash
That sequence is why many high-functioning bars place trash and paper towels near the sink, not at the far end of the run.
Common mistake: Designing a bar with a sink but no “drying/landing” space. A sink needs a nearby counter zone or the whole bar becomes a wet pile-up.
Step 3: Wet bar plumbing planning in a basement
Plumbing is the defining constraint for many basement bars. A wet bar needs a water supply and a drain. In a basement, that drain must either flow by gravity to the main line or use a lift system depending on the home’s configuration.
What your plumber and builder need to confirm
- Water supply route: where the hot/cold lines will tie in and how they’ll be accessed.
- Drain route: how the bar drain connects to the main drain line.
- Slope feasibility: consistent slope is required for gravity drainage.
- Venting strategy: vents protect trap seals and improve drainage performance.
- Cleanouts/access: maintenance access should be considered in the plan.
If you’re already planning a basement bathroom or kitchenette, plumbing coordination becomes even more important. Start here: Basement Bathroom Rough-In Guide.
Sink selection impacts plumbing and usability
“Bar sinks” are often smaller than kitchen sinks. That’s fine—if you plan accordingly. Ask yourself what you’ll rinse most:
- Wine glasses and shakers? A small sink can work.
- Snack trays, pitchers, and big bowls? A slightly larger sink may reduce frustration.
Water filtration and specialty lines
Many homeowners want filtered water at the bar (especially if it’s used daily). That can be a great upgrade—but it should be planned with the plumbing layout so components remain accessible.
Step 4: Wet bar electrical outlets and lighting (plan power like a mini kitchen)
Most bar regrets are electrical regrets: “We should’ve added another outlet,” “The fridge trips the breaker,” or “The lighting is harsh.” Electrical planning is easiest before cabinets and backsplash materials are finalized.
Outlets: plan for what you’ll plug in
Even a simple bar often uses more power than people expect. Common plug-in needs include:
- beverage fridge or undercounter fridge,
- ice maker (if included),
- coffee machine or kettle,
- blender,
- phone charging,
- accent lighting,
- and (sometimes) a microwave or warming drawer.
Outlet planning checklist:
- How many appliances are expected to run at the same time?
- Which appliances require dedicated power (confirm specs)?
- Where should outlets land so cords don’t cross the sink or prep zone?
- Will outlet placement conflict with tile patterns or open shelving?
- Do you want outlets hidden (inside cabinets or under shelves) where permitted?
Electrical requirements vary by jurisdiction and scope—especially around wet locations. Confirm outlet types and placement requirements with qualified professionals and local authorities.
Lighting: make the bar feel intentional (and usable)
A wet bar needs layered light. The goal is a space that looks great when you host but is still easy to clean and use.
- Task lighting: under-cabinet or shelf lighting to illuminate the counter.
- Ambient lighting: ceiling fixtures or recessed lighting where appropriate.
- Accent lighting: glass cabinet lighting, shelf lighting, or toe-kick glow for mood.
If your basement has low ceilings or soffits, use Basement Lighting for Low Ceilings and the service resource Basement Lighting & Electrical That Brightens Every Space.
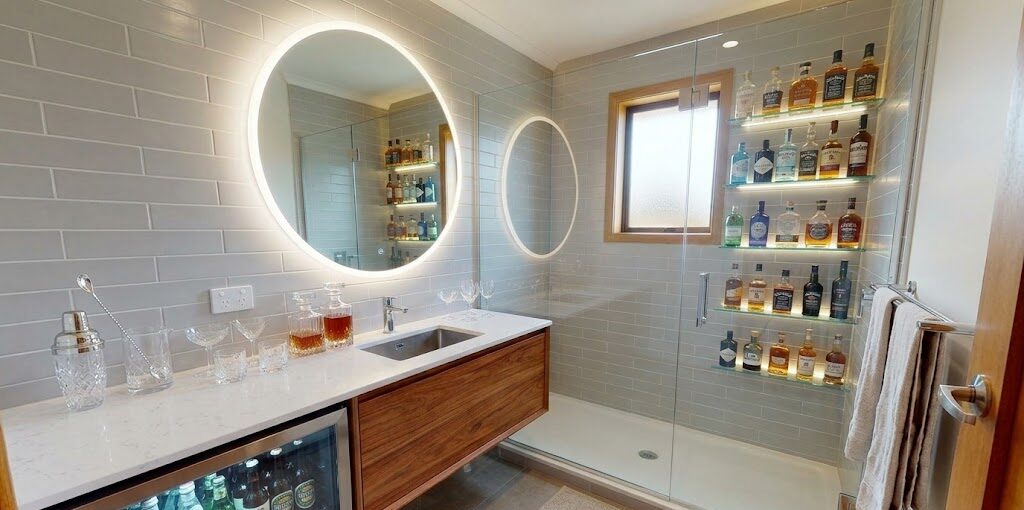
Step 5: Basement bar materials easy clean (surfaces that handle real hosting)
Bars get splashed. They also get sticky. If your materials are high-maintenance, you’ll feel it fast. Your goal is a set of surfaces that clean easily and still look premium.
Countertops: durability and cleanup first
Many wet bars use the same countertop materials as kitchens. What matters most is how the surface handles:
- acidic spills (citrus, wine, soda),
- water standing near the sink,
- frequent wiping,
- and occasional heat (if people set down warm items).
If you’re choosing stone or engineered surfaces, this comparison can help: Quartz vs. Granite vs. Porcelain Countertops.
Backsplash: protect walls where splashes happen
Backsplashes aren’t only decorative in bars—they prevent water damage and make cleanup easier. Consider:
- full-height backsplash behind the sink,
- material that tolerates frequent wiping,
- grout choices that don’t stain easily.
If you want grout to stay low-maintenance long-term, see Low-Maintenance Grout Choices.
Cabinetry finishes: spills, fingerprints, and durability
Bar cabinetry sees a lot of hand contact. Hardware, finish sheen, and door style influence how “clean” it looks day-to-day.
- Choose hardware placement that feels consistent and intentional: Cabinet Hardware Placement.
- If you’re considering higher-end custom details, understand what you’re paying for: Semi-Custom vs. Custom Cabinets.
Flooring near the bar
Because bars involve liquids, flooring durability matters—especially in basements where moisture management is already a focus. Use the basement moisture planning resources before final flooring selection:
Step 6: Storage that keeps the bar looking clean
Storage is what makes a bar feel “finished” after the party. Without it, you’ll always have bottles, mixers, and glassware sitting on the counter.
Storage zones to include
- Everyday glassware: easy reach, preferably not above the sink splash zone.
- Backup supplies: napkins, paper towels, trash bags, wipes.
- Mixers and snacks: drawers or pull-outs work well for visibility.
- Bottle storage: secure and stable (especially if kids are around).
- Trash and recycling: close to the sink and prep zone.
Hosting reality: If trash isn’t convenient, it ends up on the counter. Put it where your hands naturally go—near the sink and pour zone.
Open shelves vs. cabinets
Open shelves look great and can be practical for glassware, but they require more “styling discipline.” If you want low-effort cleanliness, more closed storage often wins.
Step 7: Appliance planning (clearances, doors, and noise)
Appliances make wet bars feel like real entertainment hubs, but only if they’re planned correctly. Common bar appliances include:
- undercounter beverage fridge,
- ice maker,
- wine fridge,
- drawer microwave (in some layouts),
- and occasionally a small dishwasher/dish drawer.
Appliance planning details that matter
- Door swing: confirm doors open fully without hitting adjacent pulls or walls.
- Ventilation clearances: follow manufacturer requirements so appliances don’t overheat.
- Noise: fridges and ice makers can be audible in a theater or quiet lounge—plan location accordingly.
- Service access: avoid building an appliance into a corner where it can’t be removed for service.
For broader appliance planning mindset, this kitchen resource is still relevant: Built-In Appliances: Layout Tips.
Step 8: Where the wet bar should live in the basement layout
A bar works best when it supports how you actually use the basement. Common placements include:
- adjacent to a theater or TV lounge,
- near a game room zone,
- between a seating area and a kitchenette zone,
- as a “landing wall” near the bottom of the stairs (with a privacy-aware layout).
If you’re still defining zones, start with: Basement Layout Planning: Zones That Make the Space Feel Bigger.
Sound and lighting coordination
Bars are often near entertainment zones—which means lighting dimmers and sound strategy matter. If the basement includes a theater or loud TV room, review:
Permits, inspections, and code notes (confirm locally)
Wet bars can trigger permit/inspection requirements depending on scope—especially when you add new plumbing, modify drains/vents, or add circuits. Requirements vary by jurisdiction and project scope, so confirm with qualified professionals and your local building department before construction begins.
Related: Permits and Inspections for Basement Finishing.
Wet bar planning checklist (review this before cabinet drawings are final)
Use this checklist to avoid the most common wet bar regrets:
- Purpose defined: drinks-only, snack-and-drinks, entertaining hub, or suite support.
- Layout zones planned: pour/serve, rinse/cleanup, cold storage, and storage zones are all accounted for.
- Sink usability checked: sink size matches what you’ll actually rinse and wash.
- Drain feasibility confirmed: slope/route/connection plan reviewed by a pro.
- Venting strategy reviewed: confirm code-compliant venting approach locally.
- Outlets planned: appliance outlets and counter outlets placed to avoid cord clutter near water.
- Lighting layered: task + ambient + accent; dimmers where appropriate.
- Materials chosen for cleanup: countertop, backsplash, and grout choices match real spill frequency.
- Storage includes “mess control”: trash, wipes, paper towels, and backup supplies have a home.
- Appliance clearances verified: door swings, ventilation, and service access confirmed.
- Moisture plan considered: basement moisture strategy reviewed before finishes are installed.
Conclusion: plan utilities first, then design the bar you’ll actually use
The best wet bars feel effortless because they’re planned like mini kitchens: smart workflow, reliable plumbing, safe and convenient electrical, and easy-clean materials that handle real hosting. If you set the bar’s purpose, confirm the utility plan, and lock in storage zones before cabinet drawings are finalized, you’ll end up with a bar that stays clean, works smoothly, and feels like a true upgrade—not a future project.
Want a wet bar that looks great and functions cleanly?
If you’re finishing a basement in Davis or Weber County, The Fortress Builders can help you coordinate wet bar layout, plumbing feasibility, electrical planning, lighting, and durable finishes—so the design works as well as it photographs.
Request a Design Consult Explore Basement Finishing Game Rooms & Wet Bars
Bring your inspiration photos and your appliance list (fridge, ice maker, microwave, etc.). We’ll help you plan utilities and layout before the cabinets are ordered.