

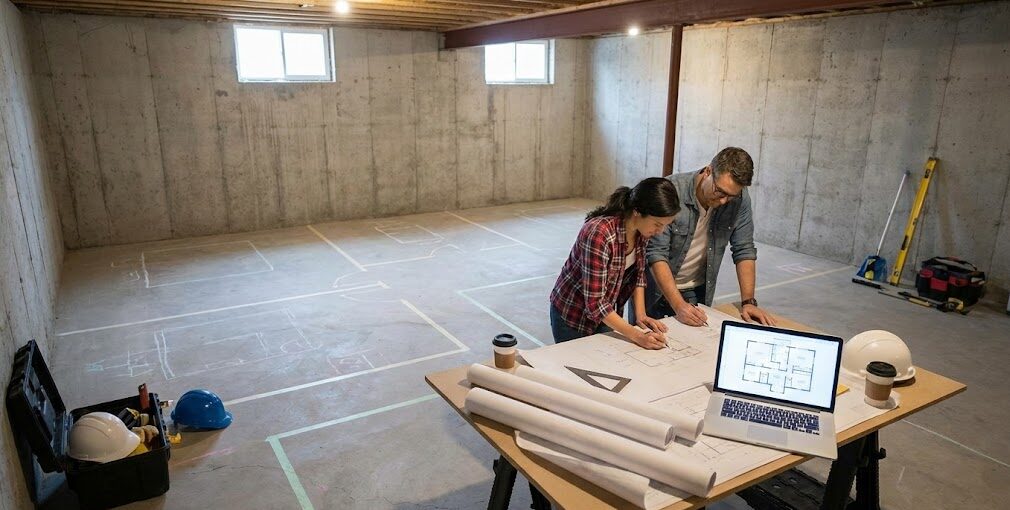
Basement layout planning: zones that make the space feel bigger
How do you lay out a finished basement so it feels bigger? Plan zones instead of rooms: put the main lounge in the best spot near the stairs, keep a clear walking path that connects the stairs, lounge, bathroom, and any bedroom, consolidate storage into one or two areas, and use soffits, posts, lighting, and rugs to define spaces. Reserve full walls for spaces that truly need them, such as bedrooms, bathrooms, and mechanical rooms.
A finished basement can be the most flexible square footage in your home—or the most frustrating. The difference usually isn’t the finishes. It’s the basement layout planning that happens before drywall, doors, and built-ins lock the space into place.
In this homeowner-friendly guide, you’ll learn how to create a basement that feels larger, brighter, and easier to live in by using finished basement zoning—clear “zones” for lounging, play, storage, work, and (when applicable) bedrooms—without chopping the basement into awkward leftover rooms.
You’ll walk away with:
- practical basement space planning tips that start with priorities (not Pinterest),
- a simple approach to basement traffic flow so the space feels intuitive,
- ways to design around ceiling soffits, mechanicals, and structural posts,
- smart basement storage zones that don’t steal comfort from daily-use areas,
- lighting and “feel bigger” tricks that work especially well below grade,
- and a furniture-first layout review so your plan works in real life.
The Fortress Builders is a Utah design–build company built on “strength through structure.” That means your basement plan isn’t just a sketch—it’s a coordinated blueprint that aligns vision, budget, code needs, and build timeline before construction begins. Fortress manages permitting, project sequencing, and craftsmanship with transparent communication—so your basement finishes as a cohesive living space, not a patchwork of compromises.
Helpful internal pages while you plan:
Why does zoning make a basement feel bigger than adding rooms?
Most basements have the same challenges: limited natural light, mechanical constraints, structural posts, and ceiling soffits that can make the space feel lower than it really is. When homeowners try to solve those challenges by adding more walls, the basement often ends up feeling smaller, darker, and harder to use.
The better approach is finished basement zoning: you define how the basement should function (lounging, play, storage, guests, work, fitness, entertaining), then design the layout so each activity has a natural “home” while still sharing light, circulation, and comfort.
The core idea: When zones are clear, you need fewer walls. Fewer walls usually means better light, smoother flow, and a basement that feels larger—without adding a single square foot.
Step 1: What should your basement do for your household?
Before you label anything “bedroom” or “theater,” define what your basement needs to do for your household in the next 1–3 years—and what it might need to do later. This keeps you from building permanent walls for a phase of life that’s already changing.
Ask the two questions that shape the whole layout
Question 1: What will we do down here most weeks?
Question 2: What do we want the basement to do occasionally (but still well)?
- Weekly use might be kids’ play, family movie nights, a home gym, or a home office.
- Occasional use might be hosting guests, overflow sleeping, holidays, game nights, or a teen hangout.
Translate priorities into a simple zone list
Most basements feel bigger when you keep the “daily” zones in the best real estate (closest to stairs, shared light, easiest ceilings), and push “occasional” zones toward areas with more constraints.
- Primary comfort zone: lounge / media / family room
- Active zone: playroom / workout / game table
- Support zone: storage, mechanical access, laundry, utility
- Quiet zone (if needed): bedroom, guest suite, office
- Hospitality zone (optional): wet bar, kitchenette, snack counter
If you’re still deciding what type of basement you want, browse real examples in the Basement Remodel Portfolio to see how different priorities change the layout.
Step 2: How should people move through the basement?
Basement layout problems often come from one root issue: the circulation path is an afterthought. You shouldn’t have to weave around furniture, cut through a game area, or pass directly in front of a TV to reach a bedroom or bathroom.
Good basement traffic flow makes a basement feel calm and “bigger” because movement is predictable. The space doesn’t feel crowded even when multiple people are using it for different things.
The “front door” of your basement is the bottom of the stairs
When you reach the bottom of the stairs, you want one of two experiences:
- Option A (open welcome): you step into a shared lounge zone with sightlines and light.
- Option B (gentle transition): you step into a small landing that helps distribute people to zones without dumping you into the middle of everything.
What you typically want to avoid: a narrow corridor that immediately forces a turn, blocks light, or makes the basement feel like a maze.
A homeowner-friendly circulation guideline
Circulation rule of thumb: Give yourself a clear “spine” path that connects stairs → lounge → bathroom → bedroom/quiet zone (if any) without cutting through the active zone.
That doesn’t mean a long hallway. It means your furniture and partitions should respect a consistent movement route. As a practical target, keep main walkways at least 36 inches wide, which also matches the typical minimum hallway width in residential code.
Where circulation commonly breaks
- TV zone in the walkway: people end up walking in front of the screen repeatedly.
- Play zone as a pass-through: toys spread into the main path and the room feels messy by default.
- Storage room door on the main hangout wall: visual clutter and constant interruptions.
- Bedroom accessed through “fun” zones: privacy and quiet are compromised.
Step 3: How do you design around soffits, posts, and low ceilings?
Basements have realities you can’t wish away: beams, duct trunks, plumbing, electrical runs, and structural posts. The goal isn’t to hide everything perfectly. The goal is to integrate these constraints so they feel intentional—like part of the design—rather than random obstacles.
Know the minimum ceiling heights
Under the International Residential Code, finished living spaces in a basement generally need a ceiling height of at least 7 feet, with beams, ducts, and other obstructions allowed down to 6 feet 4 inches. That is why soffit planning matters: a duct trunk in the wrong place can decide where a bedroom or family room can legally go. Confirm the exact rules with your local building department.
Ceiling soffits: treat them like “edges,” not failures
Soffits often appear over the exact areas you’d love a clean, tall ceiling: the middle of the room. That’s frustrating. But soffits can actually help zoning if you plan them on purpose.
- Use soffits to define transitions: a soffit line can subtly separate the lounge zone from the game zone without adding walls.
- Use soffits to anchor lighting: integrated downlights or linear fixtures can make the soffit feel like a design feature.
- Avoid “random soffit boxes”: wherever possible, align soffits into straight runs so the ceiling reads cleanly.
Lighting is one of the best tools for making soffits disappear into the design. See: Basement Lighting & Electrical That Brightens Every Space and the related guide Basement Lighting for Low Ceilings.
Structural posts: decide whether they become “furniture” or “walls”
Posts can be annoying—or incredibly useful. The worst move is to ignore a post until the end, then place furniture awkwardly around it. Instead, decide early how each post should behave:
- Option 1: integrate it into built-ins (media wall, shelving, bar, storage tower).
- Option 2: absorb it into a partial wall that helps define a zone.
- Option 3: keep it visible but align furniture so it feels symmetrical and planned.
Design question: If someone stood at the bottom of the stairs, would the posts look “random”… or like they’re part of a rhythm?
That rhythm is what makes the basement feel designed instead of patched together.
Step 4: How do you create zones without shrinking the basement?
Now the fun part: zoning. The key is to define each area clearly while keeping shared light and shared volume. That’s how a basement feels bigger.
Zone A: The lounge zone (your “anchor” space)
Most basements live or die by the lounge zone. It’s the area you’ll use the most, and it sets the tone for the entire space. Your lounge zone should usually get:
- the best ceiling height you can reasonably achieve,
- the cleanest wall for the TV/media or focal point,
- the most consistent lighting,
- and the easiest access from the stairs.
Make the lounge zone feel bigger with “edge discipline”
A basement feels bigger when the main seating area isn’t surrounded by doors, random jogs, or narrow pinch points. A practical way to do that:
- Put doors on secondary walls (storage, mechanical, under-stairs) instead of the “main view” wall.
- Keep the longest wall clean for media built-ins, art, or a simple feature wall.
- Use a large rug to define the lounge zone as a single “room” without walls.
Zone B: The active/play zone (separate activity without isolating it)
Play zones and game zones work best when they’re close enough to feel connected (especially for families) but placed so the mess and motion don’t spill into the circulation spine.
Two zoning moves that work well:
- Partial separation: a half wall, open shelving, or a wide cased opening that frames the play zone.
- Orientation separation: rotate the play zone 90 degrees from the lounge zone so they feel distinct even without walls.
Zone C: The storage zone (basement storage zones that don’t steal the good space)
Storage is where most basement plans quietly fail. The temptation is to “put storage wherever it fits,” which often means eating up the best walls, the best ceiling height, and the easiest access. Then the basement feels cramped—even though you technically have storage.
Better: design basement storage zones like you’d design a kitchen pantry: intentional, accessible, and sized for your real stuff.
Where storage belongs (most of the time)
- Under the stairs: perfect for seasonal bins, sports gear, luggage, or a hidden closet.
- Near mechanicals (but not blocking access): an “utility-adjacent” storage room can work well if it’s planned for clearance and servicing.
- Along low-ceiling edges: areas impacted by soffits can become built-in storage walls, reducing visual clutter in main zones.
- Behind the lounge zone: if you can create a storage corridor or closet that’s accessible but not visually dominant.
Storage truth: The basement feels bigger when storage is consolidated into one or two strong zones, not sprinkled everywhere.
Zone D: The quiet zone (bedroom/office/guest) and privacy planning
If you’re adding a bedroom, guest room, or office, the layout requirements get more specific. You’ll likely need privacy, acoustic separation, and (for bedrooms) code-driven considerations like egress. Details vary by jurisdiction and the specifics of your home, so confirm with qualified professionals and local authorities—especially for bedroom egress and permits.
Start here: Basement Egress Basics: What Homeowners Should Know Before Adding a Bedroom.
Quiet zone placement goals
- Not directly off the lounge zone if you expect TV, games, or gatherings.
- Close enough to a bathroom that it feels comfortable for guests or teens.
- Accessed from a predictable path that doesn’t require walking through the active zone.
Step 5: Where should bathrooms, storage, and mechanicals go?
Support zones are the parts of the basement that keep the space functioning: bathrooms, mechanical access, HVAC distribution, laundry, and sometimes a kitchenette or wet bar. If you plan these zones well, the basement feels easy. If you plan them poorly, the basement feels like you’re constantly working around something.
Bathroom placement (and why rough-ins matter)
If you’re adding a basement bathroom, placement is often influenced by existing plumbing and the practical realities of drainage and venting. The layout should coordinate early with plumbing decisions, and requirements can vary by jurisdiction—confirm details with qualified professionals and local authorities.
Related resource: Basement Bathroom Rough-In Guide: Plumbing, Venting, and Smart Placement.
Kitchenettes and wet bars (hospitality zone)
A small hospitality zone can make your basement feel like a complete living space—especially if you host, have teens, or want a future in-law suite. But these zones should be placed so they support the flow rather than interrupt it.
- Near the lounge zone: so snacks and drinks are convenient.
- Not in the main traffic spine: so people don’t line up in the path.
- With durable, easy-clean surfaces: because basements tend to become “hangout spaces.”
Explore: Basement Bathrooms & Kitchenettes That Add Function and Wet Bar Design 101.
Step 6: How can lighting make a basement feel bigger?
Lighting is the “space multiplier” in a basement. The right lighting plan can make low ceilings feel taller and make the basement feel more like a main-level living space. The wrong lighting plan can make a large basement feel dim, flat, and segmented.
Think in layers, then assign layers by zone
- Ambient lighting: overall illumination so the basement feels bright and safe.
- Task lighting: reading, games, desk work, bar prep, workout areas.
- Accent lighting: wall wash, art, shelving, stairs, features.
Zone-based lighting ideas that feel “intentional”
- Lounge zone: dimmable ambient + sconces/lamps + optional accent for media wall.
- Active zone: brighter, more even lighting (so it feels energetic and functional).
- Storage zone: simple, bright utility lighting (motion sensors can be helpful).
- Quiet zone: warm lighting with good control (avoid harsh overhead glare).
Homeowner tip: If your basement has multiple zones, plan them to be independently controllable. That way, a person can watch a movie while someone else uses the gym or play area without the whole basement being one lighting “mood.”
Deep dive: Basement Lighting for Low Ceilings: Bright, Comfortable, and Flexible.
Step 7: How do comfort and sound affect the layout?
A basement that looks great but feels cold, echo-y, or disconnected won’t get used. Comfort planning is part of space planning—because your layout decisions affect how air moves, how sound travels, and how enjoyable the zones feel.
HVAC and ventilation affect where zones should go
Finished basements need balanced temperatures and consistent airflow. Supply and return placement, zoning strategies, and humidity control can influence where you place bedrooms, theaters, and enclosed rooms. Details depend on your home and systems—review with qualified professionals.
Related: Basement HVAC & Ventilation: Keeping Finished Spaces Comfortable Year-Round.
Sound control is a zoning strategy, not just a material choice
If your basement includes a home theater, teen hangout, bedroom, or office, sound planning matters. But soundproofing isn’t only “add insulation.” Layout choices help too:
- Separate loud and quiet zones: don’t put a bedroom wall directly behind the TV wall if you can avoid it.
- Use storage zones as buffers: closets and storage rooms can sit between noisy and quiet areas.
- Plan doors and openings: large open transitions share sound; doors can protect quiet zones.
Explore: Comfort and Sound for Basements and Basement Soundproofing Strategies.
Step 8: How do you design a basement that can change later?
One of the smartest reasons to zone instead of over-walling is flexibility. Basements evolve: toddlers become teens, guest rooms become home offices, gyms become playrooms, and “storage” expands in ways nobody predicts.
Flexibility strategies that don’t feel temporary
- Use partial walls or wide openings where possible, so zones can shift later.
- Pre-plan power and lighting for potential future uses (office, gym equipment, media upgrades).
- Keep a “clean wall” option somewhere in the plan, so you can reorient furniture later without fighting doors and jogs.
- Choose storage that can adapt (a mix of fixed closets and adjustable shelving zones).
Flex mindset: Your basement layout should work for today, and it should still make sense if one zone changes. That’s what “built with confidence” looks like.
How do you test a basement layout before building?
This is the step that saves people from a basement that “looked great on paper” but doesn’t feel right once it’s finished. Before your layout is final, do a furniture-first review that tests real movement and real clearances.
What to place first (in order)
- Main seating group: sofa/sectional + chairs + coffee table + rug (lounge zone).
- Media wall/screen: TV/screen location + sightlines + speaker/built-in needs.
- Large activity pieces: game table, treadmill, ping pong, play kitchen, desk.
- Storage volumes: what you actually store (bins, strollers, holiday decor, sports gear).
Clearance checks that matter most
Quick checklist:
- Walk paths: can two people pass without squeezing around furniture?
- TV sightlines: are there natural “walk-through” paths in front of the screen?
- Door swings: do doors collide with furniture placements or create pinch points?
- Stair landing: does the bottom of the stairs feel open and safe, not cramped?
- Play mess containment: does the play zone have a defined boundary (rug, partial wall, shelving)?
- Storage access: can you access storage without interrupting the lounge zone?
What are the most common basement layouts?
Every basement is different, but many great layouts fall into recognizable patterns. Use these as starting points—not rules.
| Layout pattern | Best for | Watch-outs |
|---|---|---|
| Open lounge + support band | A spacious, bright basement for entertaining | Protect the walking path so it doesn’t cut through the lounge |
| Lounge + active wing | Families who want play and lounge areas used at the same time | Sound control and toy containment |
| Quiet suite + shared living | Guest rooms, in-law suites, and long-term value | Egress, privacy, and bathroom access drive the plan |
Layout Pattern 1: “Open lounge + defined support band”
Best for homeowners who want the basement to feel spacious and bright. You keep the main living area open and push support zones (storage, mechanical, sometimes bathroom) into a consolidated band.
- Pros: feels bigger, shares light, great for entertaining.
- Watch-outs: you must protect circulation so it doesn’t cut through the lounge.
Layout Pattern 2: “Lounge + active wing”
Best for families: lounge and play/game zones sit adjacent but oriented differently so they feel separate.
- Pros: simultaneous use, kid-friendly, flexible.
- Watch-outs: sound control and toy containment must be intentional.
Layout Pattern 3: “Quiet suite + shared living”
Best for basements with a bedroom/in-law suite goal. A quiet zone is placed off the main living area with privacy and clear access to bathroom support.
- Pros: feels like a true suite, supports guests and long-term value.
- Watch-outs: egress and code requirements can drive the plan; confirm locally.
If an in-law suite is a future goal, see: Basement In-Law Suites & Apartments Designed for Comfort and Basement In-Law Suite Planning: Privacy Zones, Storage, and Comfort.
What do you need to add a legal basement bedroom?
Basement finishing often involves permits and inspections—especially when adding bedrooms, bathrooms, electrical, or structural changes. The specifics can vary based on your jurisdiction, your home, and the scope of work. Always confirm requirements with qualified professionals and local authorities.
If the plan includes a bedroom, these are the code basics that most often shape the layout. The figures below reflect the International Residential Code, which Utah largely follows with state amendments, so confirm the exact requirements with your city or county before you design.
| Requirement | Typical code baseline |
|---|---|
| Egress window opening | At least 5.7 square feet of clear opening, at least 24 inches high and 20 inches wide |
| Egress window sill | No more than 44 inches above the floor |
| Window well | At least 9 square feet, extending at least 36 inches out; a permanent ladder or steps if deeper than 44 inches |
| Ceiling height | At least 7 feet in living spaces, 6 feet 4 inches at beams and ducts |
| Hallways | At least 36 inches wide |
| Smoke and CO alarms | Smoke alarms in each bedroom and outside sleeping areas; carbon monoxide alarms where required |
Related: Permits and Inspections for Basement Finishing: What to Expect in Utah.
Planning mindset: Your layout should be “permit-aware.” Even if you’re not building a bedroom today, designing with future egress and circulation in mind can save major rework later.
Which design decisions keep a basement feeling bigger?
These are simple decisions that consistently produce better-feeling basements—especially in homes with standard basement constraints.
Tip 1: Fewer doors on the main wall
Doors create visual breaks. Too many doors make the basement feel chopped. Consolidate doors into support bands or secondary walls when possible.
Tip 2: Use “soft zoning” before hard walls
Rugs, lighting, furniture orientation, and partial dividers define zones without shrinking the space. Hard walls are best reserved for spaces that truly require them (bedroom privacy, bathrooms, mechanical rooms).
Tip 3: Keep the circulation spine wide and obvious
Even a large basement can feel small if circulation is tight. Your future self will thank you for an intuitive path.
Tip 4: Make storage strong (and then stop)
Over-distributed storage steals prime space. Create one or two strong storage zones, then keep the main zones clean and livable.
Basement layout planning checklist
Use this checklist before you finalize the plan:
- Priorities: What are our weekly-use zones vs occasional-use zones?
- Traffic flow: Can people move stairs → lounge → bath → bedroom/office without crossing the active zone?
- Constraints: Where are soffits, posts, stairs, mechanicals, and how will they be integrated?
- Storage zones: Where does storage live, and does it steal prime walls/ceilings?
- Lighting zones: Do zones have independent controls and layered lighting?
- Comfort: Have HVAC, ventilation, and sound needs been considered for enclosed rooms?
- Future flexibility: If one zone changes later, does the layout still work?
- Furniture-first test: Are seating, sightlines, and clearances proven—not assumed?
- Code basics: Have ceiling heights, egress, smoke alarms, and hallway widths been confirmed for any bedroom?
Can AI tools help you plan a basement layout?
AI floor-plan and design tools are useful for exploring options early, as long as the plan is checked against real measurements and code.
- Test zoning ideas: AI floor-plan tools can quickly generate several zone arrangements from your dimensions, so you can compare open, wing, and suite layouts.
- Visualize the feel: AI renderings can show how lighting, finishes, and furniture change how big a space feels.
- Know the limits: AI layouts often ignore posts, duct trunks, egress requirements, and ceiling heights. Measure those first and have a professional confirm that the plan is buildable and permit-ready.
Frequently asked questions about basement layout planning
How do you make a finished basement feel bigger?
Use zones instead of many small rooms, keep a clear walking path, consolidate storage, plan layered lighting with separate controls, and reserve full walls for bedrooms, bathrooms, and mechanical rooms.
What is basement zoning?
Basement zoning means planning areas by activity, such as lounge, play, storage, quiet, and hospitality zones, and defining them with layout, lighting, furniture, and partial walls rather than enclosing every area as a separate room.
What do you need to add a bedroom in a basement?
Typically an egress window or door that meets code, adequate ceiling height, smoke alarms, and a permit. Under the IRC, egress windows generally need at least 5.7 square feet of clear opening and a sill no higher than 44 inches. Confirm local requirements.
What is the minimum ceiling height for a finished basement?
Under the International Residential Code, living spaces generally need at least 7 feet, with beams and ducts allowed down to 6 feet 4 inches. Local amendments can vary.
Where should storage go in a finished basement?
Under the stairs, near mechanical rooms (without blocking service access), and along low-ceiling edges. Consolidating storage into one or two zones keeps the main living areas open.
Where should a basement bedroom go?
Away from the lounge and media wall, close to a bathroom, on a wall where an egress window can be added, and reached without walking through the play or active area.
Do you need a permit to finish a basement in Utah?
Usually, yes, especially when adding bedrooms, bathrooms, electrical, or HVAC changes. Requirements vary by city and county, so check with your local building department.
Conclusion: a planned basement feels bigger because it works better
A great basement doesn’t feel like leftover square footage. It feels like a natural extension of your home—designed around how your family actually lives. That’s what strong basement layout planning and clear finished basement zoning deliver: smoother flow, better light, smarter storage, and zones that feel intentional without walls doing all the work.
If you’re planning a basement finish in Davis or Weber County, The Fortress Builders can help you turn your priorities into a permit-aware, build-ready plan—coordinating layout, systems, and finishes so the final space feels cohesive, comfortable, and built to last.
Want a basement plan you can trust before construction starts?
Bring your basement measurements, your wish list, and any “must-have” constraints (bedroom goals, storage needs, low ceilings, mechanical locations). Fortress Builders will help you zone the space, protect traffic flow, and create a furniture-first layout review so your basement feels bigger—and works better—every day.
Request a Design Consult Explore Basement Finishing Basement Space Planning
With a clear process from concept to completion, you’ll move forward with confidence—no chaos, no patchwork, and no “we’ll figure it out later” surprises.
Last updated: