
Bathroom Lighting Plan: Vanity Sconces, Mirrors, and Overhead Lighting
Bathroom Lighting Plan: Vanity Sconces, Mirrors, and Overhead Lighting
Why this matters: Bad lighting makes great finishes look worse. It can turn a beautiful tile wall into a gray cave, make a “soft white” paint look dingy, and throw shadows across your face that make everyday routines harder than they need to be.
A good bathroom lighting plan isn’t about buying the fanciest fixtures. It’s about designing light where you need it—at the mirror, in the shower, and across the room—so the bathroom feels comfortable at 6:30 a.m. and at 9:30 p.m.
This homeowner-friendly guide covers:
- How to build layered bathroom lighting (vanity + ambient + shower + accent)
- Vanity sconces placement basics (the “avoid shadows” strategy)
- Bathroom mirror lighting options (sconces, over-mirror lights, LED mirrors, and what to watch for)
- Overhead and shower lighting choices that feel bright without glare
- Dimmers, switches, and “lighting scenes” that make the room feel effortless
- What to decide before electrical rough-in so you don’t get stuck with compromises
The Fortress Builders is a Utah design–build company built on one principle: strength through structure. That means we plan the systems behind the finishes—layout, electrical, ventilation, waterproofing, and lighting—so your bathroom performs as well as it looks.
Related internal resources:
- Bathroom Remodeling in Utah: Built to Last
- Bathroom Fixtures & Lighting That Elevate Daily Routines
- Small Bathroom Vanity Guide: Storage, Clearance, and Daily Comfort
- Bathroom Ventilation & Moisture Control Done Right
- Request a Design Consult
Important note: Electrical requirements, safety rules for wet/damp areas, permits, and inspection practices can vary by jurisdiction and scope. Always confirm details with qualified professionals and local authorities, and follow manufacturer installation instructions for all fixtures, controls, and bulbs.
Bad lighting makes great finishes look worse—here’s how to fix it
Bathrooms are “honest” spaces. They expose everything: grout lines, paint undertones, mirror streaks… and lighting mistakes.
And here’s the tricky part: a bathroom can be technically bright but still feel unpleasant if the light is harsh, overly cool, or coming from the wrong direction.
The goal: Create light that feels even and flattering at the vanity, comfortable and safe in the shower, and flexible enough for different times of day—without glare or weird shadows.
This is why designers and experienced remodelers lean on one big concept: layered bathroom lighting.
Layered bathroom lighting in plain English
Layered lighting simply means you use more than one type of light—because one fixture can’t do every job well.
The 3 core layers (plus a bonus layer)
- Task lighting: Light for doing things—shaving, makeup, skincare, contacts. This is usually your vanity lighting.
- Ambient lighting: Light for “being in the room.” It fills the space so you’re not walking into a cave.
- Shower/tub lighting: Light for safety and visibility where water happens.
- Accent/night lighting (bonus): Light for mood, navigation, or “soft glow” at night.
When homeowners say “I want a brighter bathroom,” what they often mean is: I want better light at the mirror and less shadow on my face. That’s task lighting—and it’s where a lot of bathroom lighting plans either succeed or fail.
Most common bathroom lighting mistakes (and why they happen)
Let’s call out the usual culprits. If you’ve ever stood at a vanity and thought, “Why do I look tired in here?”—it’s often one of these.
Mistake #1: Lighting only from above the mirror
Top-down lighting creates shadows under eyes, brows, and chin. Even if it’s bright, it’s not the most flattering or functional direction for face-level tasks.
Mistake #2: One overhead can light trying to do everything
One recessed light in the ceiling can make the room “not dark,” but it usually fails at vanity tasks because it throws shadows on your face from above.
Mistake #3: No dimming (so the bathroom has one mood: “stadium”)
Bathrooms are used at night, early mornings, and everything in between. Without dimming, you either get harsh light when you don’t want it—or you keep the bathroom dark and fight through your routine.
Mistake #4: The mirror and lighting weren’t planned together
A mirror that’s too wide, too tall, or mounted without thinking about sconces can force awkward fixture placement. Or you end up with a light fixture that blocks the mirror’s best use.
Mistake #5: Cool, blue-ish bulbs that make the bathroom feel clinical
Color temperature is personal, but many homeowners are surprised how “cold” some LED bulbs feel—especially against warm finishes like wood tones, beige tile, or brass fixtures.
Step 1: Start your bathroom lighting plan with routines and zones
Before you choose fixtures, map the bathroom like a set of “mini spaces”:
- Vanity zone: face-level grooming, washing hands, daily setup
- Shower/tub zone: safety, visibility, relaxing atmosphere
- Toilet/water closet zone: basic light + optional nightlight
- General room zone: overall brightness, cleaning, getting dressed
Then ask: what does “good light” mean for your household?
- Do you apply makeup daily?
- Do you shave at the vanity?
- Are there kids who need a softer night option?
- Do you want bright light for cleaning?
- Do you want a spa vibe for baths?
Simple planning prompt: List your top 3 bathroom “moments.”
- Morning routine: bright, clear, shadow-free
- Evening wind-down: softer, warm, calming
- Nighttime: safe navigation without getting blasted by light
When you know the moments, your lighting plan becomes much easier to build.
Vanity lighting options: what actually avoids shadows
Vanity lighting is the “face lighting.” It’s the part of the plan you’ll notice every single day.
If your goal is to avoid shadows bathroom lighting problems, the most reliable strategy is: light your face from the front, not just from above.
Option A: Side sconces (the classic “best practice” approach)
Vanity sconces placement on either side of the mirror is popular for a reason: it tends to create more even light across the face, reducing shadows under eyes and chin.
Side sconces also create a high-end look because they feel intentional and architectural.
Option B: Vertical fixtures integrated near the mirror
Some bathrooms use vertical light bars or slim fixtures that function like sconces. The benefit is similar: broad, even light across the face.
Option C: Over-mirror vanity lights (works, but plan carefully)
Over-mirror lights can work well—especially if side sconces aren’t possible due to tight wall space, a window, or cabinetry.
The risk is that over-mirror lighting can become top-down and shadow-heavy if:
- the fixture is too close to the mirror,
- the light source is too directional,
- or the bathroom relies on that single fixture alone.
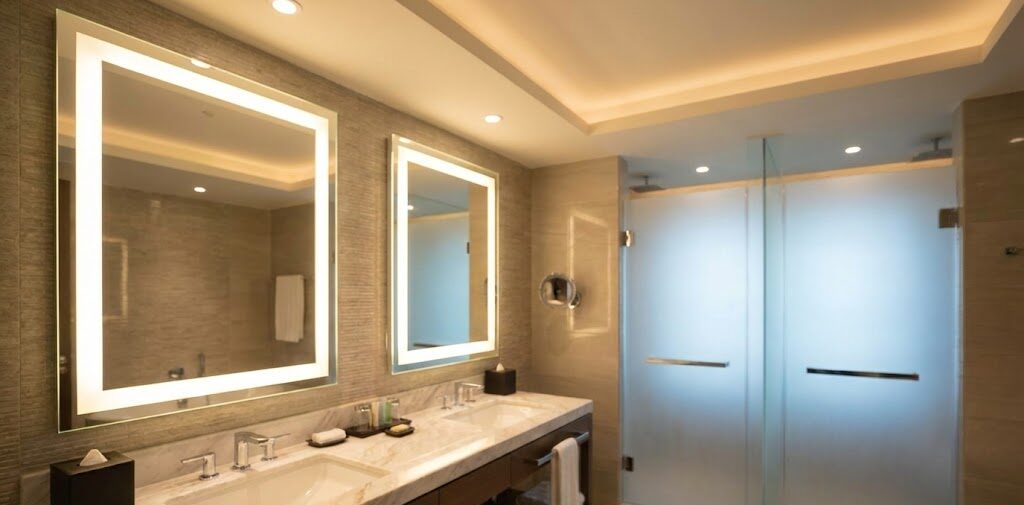
Option D: LED mirrors (front-lit or backlit)
LED mirrors are increasingly common because they can produce very even light and create a clean, modern look.
Two common styles:
- Front-lit: light shines through the mirror’s face (often more functional for tasks).
- Backlit: light glows from behind the mirror (often more ambient and mood-oriented).
Some homeowners love them, especially in smaller bathrooms where wall space is tight. Others still prefer the warmth and flexibility of separate sconces. There’s no one “right” answer—what matters is performance at the mirror.
Homeowner reality check: A mirror with built-in light can look incredible—but you still need ambient light for the room, and often a shower light too. Don’t let the mirror be the whole plan.
Vanity sconces placement: practical guidelines (without being fussy)
Homeowners often ask: “What’s the exact rule for sconce placement?”
In real remodels, placement depends on mirror size, vanity width, ceiling height, and whether the bathroom has one sink or two. That said, these are widely used planning principles:
1) Aim for face-height light
For most adults, sconces are often positioned around eye level (or slightly above), so light hits the face from the front. Many designers use a typical height range as a starting point, then adjust for the household and fixture size.
Note: Exact heights vary with mirror height, ceiling height, and fixture design. Your electrician/designer should confirm placement on-site before rough-in.
2) Keep sconces close enough to the mirror to “frame” the face light
Sconces that are too far out can create side shadows or feel disconnected from the mirror. Sconces that are too close can be cramped. The goal is a balanced “frame” around the mirror.
3) Choose fixtures that spread light (not tiny spotlights)
For vanity use, you generally want a fixture that diffuses light—think frosted glass or shaded fixtures that spread light rather than a narrow beam.
4) Plan around the mirror, not just the wall
Mirror width and placement affect everything. If sconces are in the plan, decide the mirror size early.
Bathroom mirror lighting: how the mirror changes the plan
Mirrors don’t just reflect your face—they reflect light. That means mirror choices affect:
- how bright the vanity area feels,
- whether you get glare,
- and how fixtures “read” visually on the wall.
Mirror sizing: function before symmetry
A symmetrical mirror can look great, but small bathrooms often need function-first choices:
- If the vanity is tight and you need sconces, the mirror might be slightly narrower to make room.
- If you have a double vanity, you might choose one large mirror or two separate mirrors based on sconce placement, storage, and style.
Mirror planning also connects to vanity planning. If you’re still choosing vanity size, this guide can help: Small Bathroom Vanity Guide: Storage, Clearance, and Daily Comfort.
Mirrors with storage: medicine cabinets (recessed vs surface)
If you need storage, a medicine cabinet can be one of the most powerful “small bathroom” upgrades. Recessed units add storage without sticking far into the room.
But here’s the lighting catch: medicine cabinet size and placement can limit sconce locations. If you want both, plan early so the cabinet and fixtures work together.
Glare control: avoid the “laser beam mirror” problem
Glare happens when the light source is visible in the mirror or reflected at the wrong angle. You can reduce glare by:
- choosing diffused fixtures (frosted or shaded),
- using multiple light sources instead of one intense source,
- adding dimming so you can soften output when needed,
- avoiding fixtures that aim bare bulbs directly at the mirror.
Overhead lighting: how to make it feel bright without feeling harsh
Overhead lighting isn’t “bad.” It’s just incomplete when it’s the only source of light.
A good plan often uses overhead lighting for:
- overall brightness,
- cleaning,
- safe movement through the space,
- and support for the vanity lighting (so the room feels balanced).
Common overhead options in bathrooms
- Recessed lights: clean ceiling look, good general light when placed well
- Flush mounts: classic solution; can be softer than recessed depending on shade/diffusion
- Semi-flush mounts: adds style; works well when ceiling height allows
Placement tip: avoid putting a can light directly over where you stand at the vanity
If a recessed light is directly above your head at the sink, it can create strong shadows on your face. A better approach is often:
- use vanity task lighting for the face,
- use overhead lighting to fill the room and reduce contrast.
Note: The exact layout depends on ceiling height, vanity position, and fixture output. Your electrician or designer should confirm a final plan during design and at rough-in.
Shower and tub lighting: safety, comfort, and the “right rating”
Shower lighting is about visibility and safety. It also affects how “clean” the shower feels and whether the tile reads as bright or gloomy.
What to know about damp vs wet locations
Bathrooms include moisture and steam, and showers are direct water zones. Fixtures have ratings for where they can be installed safely.
Important: Fixture rating requirements and installation rules can vary by location and by the specific shower setup. Always follow manufacturer instructions and confirm requirements with qualified professionals and local authorities.
One shower light vs two
In many showers, one well-placed, properly rated fixture can be enough. In larger showers (or showers with dark tile), additional lighting can help reduce shadows and create a brighter feel.
A comfort tip: don’t forget the “relax” setting
If you love baths or spa-like showers, you may want the option for softer lighting. This is where dimming or separate switching becomes a quality-of-life upgrade.
Dimmers and controls: the part of the plan you’ll thank yourself for
Homeowners sometimes skip dimmers to “simplify decisions.” But in bathrooms, dimming is one of the highest comfort upgrades for the money—especially when paired with layered lighting.
Why dimming matters in bathrooms
- Mornings: bright enough to wake up and see clearly
- Evenings: softer light that feels calm, not harsh
- Night: low light for navigation without blasting your eyes
LED dimming: plan compatibility
Not all LED fixtures dim the same way. Some need specific dimmer types, and some combinations can cause flicker or limited dim range.
Planning note: Confirm dimmer compatibility with the fixture manufacturer and your electrician. This is a common place where “good planning” prevents frustration later.
Switching strategy: separate the layers when possible
One of the most homeowner-friendly ways to design controls is to separate light layers so you can adjust the bathroom for different moments. For example:
- Vanity lights on one switch (often dimmable)
- Overhead/ambient on another switch (often dimmable)
- Shower light on its own switch (or grouped with overhead depending on layout)
- Optional: toe-kick/night light or accent lighting on its own control
“Lighting scenes” that work for many households:
- Get-ready mode: Vanity task lighting + some ambient light (bright, even)
- Evening mode: Vanity dimmed low + soft ambient (warm, relaxing)
- Night mode: A low-level light (toe-kick, night light, or dimmed ambient) without turning on everything
- Cleaning mode: All lights on full (bright, practical)
Color temperature and “why your bathroom looks weird” sometimes
Two bathrooms can have the same tile and paint—but feel totally different—based on light color.
In lighting terms, “color temperature” describes whether light feels:
- Warm: more yellow/soft (often feels cozy and flattering)
- Neutral: balanced white (often feels clean and accurate)
- Cool: more blue/bright (can feel crisp, but sometimes harsh)
What most homeowners prefer (general guidance)
There isn’t one perfect choice, but many homeowners aim for a warm-to-neutral range in bathrooms because it feels comfortable on skin and works with many finish palettes.
Tip: If you’re using multiple fixtures, try to keep the color temperature consistent so the bathroom doesn’t feel “patchy” (warm vanity + cool overhead can feel strange).
CRI: the “does my face look normal?” factor
CRI (Color Rendering Index) is a measure of how accurately a light source shows colors. Higher CRI lighting tends to make skin tones and finishes look more natural.
Many homeowners and designers look for higher-CRI options in vanity lighting because it’s where you notice color accuracy most (makeup, skincare, shaving).
Note: CRI is just one factor—diffusion, placement, and layered lighting still matter a lot.
Plan lighting with finishes: tile, paint, and mirrors all change brightness
Lighting decisions shouldn’t happen in a vacuum. Finishes affect how light bounces and how bright the room feels.
Dark tile isn’t a problem—if lighting is planned for it
Dark or moody tile can look incredible, but it often needs a stronger lighting plan because it absorbs more light than a white wall tile.
If you love dark finishes, consider:
- stronger vanity task lighting (to keep faces bright),
- adequate ambient lighting (so the room doesn’t feel cave-like),
- shower lighting that prevents the shower from looking dim.
Matte finishes can reduce glare (but can feel dim if under-lit)
Matte tile and matte paint can feel calm and high-end—but they bounce less light than glossy surfaces. Again: not a problem, just something your plan should account for.
Mirrors can “amplify” light when placed well
A well-placed mirror can help distribute light and make the room feel larger. But it can also amplify glare if fixtures are poorly aimed or too intense.
Lighting and moisture: protect fixtures and reduce fog problems
Bathrooms are humid spaces. That affects lighting in a few practical ways:
- Some fixtures need damp- or wet-location ratings depending on where they’re installed.
- Steam can fog mirrors and collect on glass shades or recessed trims.
- Poor ventilation can make bulbs and fixtures work in a harsher environment over time.
Ventilation doesn’t just help comfort—it also supports longevity for finishes and bathroom components. If your bathroom fogs up heavily, this service page is useful context: Bathroom Ventilation & Moisture Control Done Right.
Bathroom lighting plan examples (common layouts)
Let’s make this concrete. Here are a few common bathroom types and how layered lighting often comes together. These are general examples—not a substitute for project-specific design, fixture specs, or local code requirements.
1) Small powder room (half bath)
Goal: flattering mirror light + comfortable ambient.
- Vanity: one pair of small sconces, or one well-chosen mirror light
- Ambient: a decorative ceiling fixture or recessed light
- Controls: dimmer if possible (powder rooms feel amazing with dimming)
Powder rooms are a great place for a statement light—but don’t sacrifice face lighting at the mirror.
2) Hall bath with single vanity + tub/shower
Goal: practical, easy routines for guests or kids.
- Vanity: side sconces if wall space allows, or a quality over-mirror fixture + strong ambient support
- Shower/tub: a properly rated shower light
- Ambient: recessed or flush mount that fills the room
- Controls: consider separate vanity vs shower/ambient switching
This is also where planning storage, mirror size, and lighting together helps. Related: Small Bathroom Vanity Guide.
3) Primary bathroom with double vanity
Goal: two-person usability without shadows.
- Vanity: one pair of sconces per sink (or a long, well-designed mirror + thoughtful task lighting)
- Ambient: recessed lights placed to fill the room (not just over heads at the vanity)
- Shower: one or more properly rated shower lights depending on size and tile color
- Optional: accent lights for a spa vibe, plus dimming
4) Bathroom with a separate water closet
Goal: comfort and convenience.
- Include a light inside the water closet (often a simple ceiling fixture)
- Consider a softer “night mode” option if it’s used at night
- Make sure switching is convenient (no one wants a scavenger hunt in the dark)
Lighting before electrical rough-in: what to decide early
This is the moment that saves stress. Lighting feels like a “finish decision,” but many key choices need to happen before walls are closed and tile goes up.
Big idea: A strong lighting plan needs to be finalized before electrical rough-in. After rough-in, changes get more expensive and more compromised.
Decisions that should be made before rough-in
- Mirror size and placement (especially if using sconces)
- Vanity fixture type (sconces vs over-mirror vs LED mirror)
- Overhead fixture count and location (recessed layout, ceiling fixture placement)
- Shower/tub light location (and rating requirements)
- Switching and dimming plan (what’s on which switch, dimmers, multi-way controls if needed)
- Outlet locations (hair tools, chargers, electric toothbrushes)
- Any feature lighting (toe-kick, niche lighting, accent strips—if desired)
Important note: Electrical codes and safety requirements vary. Confirm outlet placement, GFCI protection, fixture ratings, and switching requirements with a qualified electrician and local authorities.
Want the bigger picture of how these decisions fit into a remodel timeline? This resource is helpful: Timeline and What to Expect.
Budgeting your lighting plan: where to invest (and where to simplify)
Lighting can range from simple to high-end quickly. Here’s a homeowner-friendly way to prioritize without getting lost.
Where spending often pays off
- Vanity task lighting: You use it daily. Better diffusion and color quality can make routines easier.
- Dimmers and controls: Comfort upgrade that changes the “feel” of the room instantly.
- Shower lighting: Safety and visibility matter; choose appropriately rated fixtures.
Where you can simplify
- Ambient fixtures: A clean recessed plan or a good flush mount can be very effective.
- Decorative choices: You don’t need every fixture to be a statement. A bathroom can look cohesive with one “feature” fixture and supporting lights that fade into the background.
Cost-control tip: Decide your lighting strategy first (layers + controls), then choose fixtures within your style and budget. Most regret comes from buying fixtures first and trying to force a plan around them.
Quick troubleshooting: why bathrooms still feel “off” after a remodel
Sometimes homeowners upgrade a bathroom and still feel like the lighting isn’t right. Here are common reasons:
The vanity is bright but faces still feel shadowed
- Light is mostly overhead (top-down)
- Fixture is too directional (spotty light)
- Sconces are mounted too high or too far from the mirror
The room is bright but feels harsh
- Light color temperature is too cool for the finishes
- No dimmers, so everything is always “full blast”
- Too much glare from bare bulbs or shiny finishes
The shower feels dark
- Shower light output is low for the space/tile color
- Only one fixture in a larger shower
- Fixture lens is frosted heavily (diffusion is good, but it reduces output)
Most of these issues are preventable with early planning—especially by designing light layers and control flexibility.
Bathroom lighting plan checklist (copy/paste friendly)
Use this checklist before electrical rough-in:
- Vanity lighting: Sconces, over-mirror fixture, or LED mirror? Why?
- Vanity sconces placement: Is there wall space, and is mirror size finalized?
- Mirror choice: Standard mirror or medicine cabinet? Recessed or surface?
- Ambient lighting: What fills the room when vanity lights are off?
- Shower/tub lighting: Fixture type and rating confirmed for location?
- Controls: Separate switches for layers? Dimmers planned and compatible?
- Night option: Is there a low-light way to navigate at night?
- Color consistency: Are fixture color temperatures aligned (so light doesn’t look mixed)?
- Glare check: Will bulbs be visible in the mirror? Any harsh reflections?
- Electrical planning: Outlets/switches placed for real routines?
- Ventilation: Fan plan supports moisture control (helps fixtures and finishes long-term)?
- Permits/inspections: Any electrical changes requiring approvals confirmed with pros?
Questions to ask your remodeler or electrician
- “Where will face-level light come from at the vanity?”
- “How are we avoiding shadows at the mirror?”
- “What will the bathroom feel like at night—do we have a low-light option?”
- “Are shower fixtures rated appropriately for this location?”
- “Can we separate vanity, ambient, and shower lights on different switches or dimmers?”
- “Are the fixtures and dimmers compatible to avoid flicker?”
- “Do we need permits or inspections for any electrical changes?”
How Fortress Builders helps homeowners get bathroom lighting right
A strong bathroom lighting plan is a “strength through structure” decision. The tile and vanity might be the visible stars—but lighting is what makes the room feel good every day.
Fortress Builders helps homeowners in Davis and Weber Counties:
- design layered bathroom lighting that matches routines, not just trends,
- plan bathroom mirror lighting and vanity sconces placement before rough-in,
- coordinate lighting with vanity selection, mirror size, ventilation, and layout,
- build a plan that avoids harsh shadows and glare,
- and manage the remodel with clear steps and communication from concept through completion.
Explore:
- Bathroom Fixtures & Lighting That Elevate Daily Routines
- Bathroom Remodeling in Utah: Built to Last
- Bathroom Remodel Portfolio — Utah Homes
- Your Guide to a Seamless Remodel
Conclusion: plan lighting before rough-in (your future self will thank you)
The best bathroom lighting doesn’t happen by accident. It comes from a simple strategy:
- Use layered bathroom lighting (task + ambient + shower, plus optional accent).
- Prioritize face-level light at the mirror to avoid shadows bathroom lighting problems.
- Plan the mirror and fixture layout together so your bathroom mirror lighting actually works.
- Add dimming and smart switching so the bathroom fits morning, evening, and night routines.
- Finalize the plan before electrical rough-in so you don’t get boxed into compromises.
Want help building a bathroom lighting plan that feels effortless?
If you’re remodeling in Davis or Weber County, Fortress Builders can help you plan vanity lighting, mirror layout, overhead and shower lighting, and controls before rough-in—so the bathroom looks better and works better from day one.
Request a Design Consult Explore Bathroom Remodeling Fixtures & Lighting