
Basement Kitchenette Planning: Power, Plumbing, and Layout Tips
Basement Kitchenette Planning: Power, Plumbing, and Layout Tips
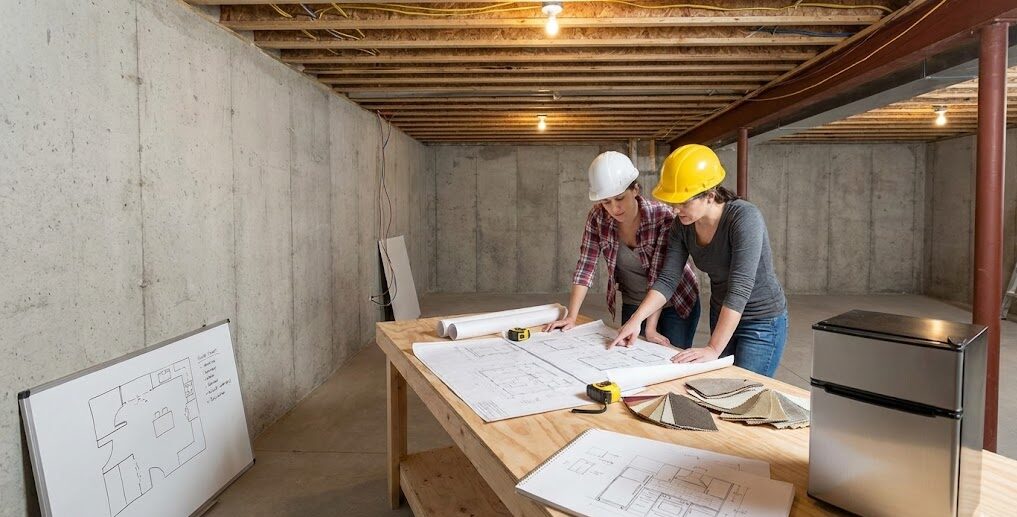
A basement kitchenette can be a simple snack zone for movie nights—or a true second kitchen that supports an in-law suite or basement apartment. Either way, the projects that feel “easy” later are the ones that get the invisible details right early: power, plumbing, clearances, and ventilation.
In this homeowner-friendly guide to basement kitchenette planning, we’ll walk through the decisions that prevent rough-in surprises and awkward cabinet layouts—especially around basement kitchenette electrical outlets, basement sink plumbing planning, and a functional basement apartment kitchenette layout.
In this guide, you’ll learn:
- how to define your “kitchenette level” (snack station vs. true kitchen),
- how to build an appliance list that drives layout and rough-ins,
- what to know about sink drainage and venting in a basement,
- how to plan outlets and circuits before cabinets are ordered,
- ventilation basics (and when it becomes a real requirement),
- storage and durability choices that hold up below grade,
- and a pre-cabinet checklist that keeps the build smooth.
The Fortress Builders is a Utah design–build company built on “strength through structure.” That means your basement kitchenette isn’t planned in isolation. It’s coordinated with your full basement layout, mechanical routes, moisture management, and long-term flexibility—so the finished space looks intentional and performs reliably.
Helpful pages while you plan:
Basement kitchenette planning: power, plumbing, and layout tips
lan it like a kitchen, even if you call it a kitchenette. The word “kitchenette” makes people think the project is simple. Sometimes it is. But most basement kitchenette frustrations happen for the same reason kitchen remodels go sideways: the layout was finalized before the rough-ins were verified.
Cabinets get ordered… then you realize the sink can’t drain where you want it. Or the fridge needs a dedicated circuit that wasn’t planned. Or the microwave lands exactly where you wanted open shelves. The solution is a structured planning sequence: define use → lock the appliance list → confirm plumbing feasibility → plan electrical → confirm ventilation → then finalize cabinets and finishes.
Homeowner takeaway: Your kitchenette doesn’t have to be big to be well planned. It just has to be planned in the right order.
Step 1: Define how you’ll actually use the kitchenette
Before you measure cabinets or browse tile, decide what “success” looks like for your household. A kitchenette that supports movie nights has very different requirements than one used every day by a tenant or an in-law.
Three practical kitchenette “levels”
- Level 1: Snack + beverage zone – undercounter fridge, microwave, open counter space, optional small sink.
- Level 2: Entertaining station – beverage fridge + sink + better storage + serving counter (often near a lounge, theater, or game room).
- Level 3: Apartment-ready kitchen – full fridge, cooking appliance, real prep space, code-aware ventilation, and a layout that supports daily use.
Quick decision prompt:
- Is this for occasional hosting or daily meals?
- Do you need cooking or just reheating?
- Will guests/tenants need dishwashing (dishwasher or bigger sink)?
- Is this part of an in-law suite plan?
If your long-term plan includes a private living zone downstairs, explore Basement In-Law Suites & Apartments Designed for Comfort.
Step 2: Appliance planning (the hidden driver of layout)
Appliances determine cabinet sizes, electrical circuits, ventilation needs, and clearance requirements. That’s why kitchenette appliance planning should happen before you finalize the layout or order cabinetry.
Build a simple “appliance list”
Start with what you know you need, then decide what’s optional:
- Cold storage: mini fridge, beverage fridge, undercounter fridge, or full-height refrigerator
- Heating: microwave, microwave drawer, speed oven, toaster oven space
- Cooking: electric cooktop, induction cooktop, range (apartment-ready)
- Cleaning: sink only, sink + dishwasher, sink + drying space
- Specialty: ice maker, wine fridge, small freezer drawer
Clearance checks that prevent “oops” moments
- Door swings: fridge doors and dishwasher doors need room to open without colliding with walls or islands.
- Depth: some undercounter units require more depth than standard base cabinets.
- Ventilation space: many fridges and specialty units need breathing room per manufacturer specs.
- Access: avoid trapping appliances behind tight corners where removal is difficult later.
For broader kitchen appliance considerations (including ventilation), see Kitchen Appliances & Ventilation Upgrades.
Step 3: Basement sink plumbing planning (where kitchenettes get real)
A sink is the feature that turns a “nice-to-have” kitchenette into something that truly works. But a basement sink also introduces the most technical constraints: drainage slope, venting, and tie-ins to existing plumbing.
Start with this reality: drains rely on gravity
Most basement sink drains need a consistent slope to connect to the home’s main drain line. If the route is long, obstructed, or higher than your intended sink location, solutions can become more complex.
Planning rule: Don’t lock cabinets or countertops until you’ve verified drain feasibility and a realistic route.
Three placement strategies that often reduce complexity
- Near existing plumbing stacks: aligning with a bathroom or laundry zone can reduce long runs.
- Near mechanical/utility routes: sometimes the cleanest path runs through a utility corridor (if planned intentionally).
- On an exterior wall (sometimes): can help with routing in certain layouts, but not always best for vents or freezing risk—review with a pro.
Venting: the part homeowners don’t see
Plumbing vents protect drainage and trap seals. Venting requirements vary by jurisdiction and configuration. Some solutions are allowed in certain areas and not in others. Confirm details with qualified professionals and local authorities.
If you’re also adding a bathroom in the basement, coordinate planning with Basement Bathroom Rough-In Guide so wet zones and plumbing routes support each other.
Step 4: Basement kitchenette electrical outlets and circuits
Electrical planning is where “small kitchen” assumptions can cause big headaches. Even a compact kitchenette may need multiple circuits depending on the appliance mix. And countertop outlets must be safe, accessible, and code-aware.
What “outlets” really means in a kitchenette
In most real-world builds, you’re planning for:
- Dedicated circuits for certain appliances (often fridge, microwave, cooktop, dishwasher, specialty units),
- Countertop receptacles for small appliances, charging, or occasional use,
- Lighting circuits (ambient + under-cabinet + accent),
- Low-voltage needs (optional): speaker, network, smart controls.
Outlet placement tips that keep it functional and clean
- Plan outlets to support how you’ll use the counter. If you’ll plug in a coffee maker daily, give it a home.
- Avoid “outlet surprises” after backsplash decisions. The best-looking backsplash is the one you didn’t have to cut up at the last minute.
- Think about appliance cords and landing zones. Microwaves, beverage fridges, and undercounter units have cord and plug realities that affect cabinet details.
Electrical requirements and outlet rules vary by jurisdiction and project scope. Confirm requirements with qualified professionals and local authorities—especially when adding circuits, modifying panels, or installing appliances.
Related internal resource: Basement Lighting & Electrical That Brightens Every Space.
Step 5: Ventilation basics (when it matters, and why)
Ventilation needs depend on what your kitchenette includes.
If you’re not cooking
If your kitchenette is a beverage/snack station with a microwave and fridge, ventilation may be mostly about comfort: managing smells, keeping the basement feeling fresh, and ensuring the HVAC system supports the extra heat from appliances. A good baseline is to plan the kitchenette near existing return/supply airflow paths.
If you are cooking
If your basement apartment kitchenette layout includes a cooktop or range, ventilation becomes a bigger topic. Requirements vary by jurisdiction, appliance type, and layout. Confirm with qualified professionals and local authorities.
For kitchen ventilation planning concepts, see Kitchen Appliances & Ventilation Upgrades. For whole-basement comfort planning, see Basement HVAC & Ventilation Planning.
Simple ventilation question: Are you planning to create cooking smoke/grease, or mostly heat + minor odors?
Your answer determines whether you’re designing a convenience zone or a true kitchen system.
Step 6: Layout tips for a basement apartment kitchenette layout
Even a small kitchenette benefits from basic kitchen planning: you need a workable sequence from cold storage → prep → heating/cooking → clean-up. That flow doesn’t have to be big. It just has to be clear.
Choose the simplest layout that fits the function
- Single-wall kitchenette: common for basements; compact, clean, cost-effective, and ideal when plumbing access is limited.
- L-shape kitchenette: adds more counter space and can separate “prep” from “serving.”
- Galley (two-wall): can be efficient but needs good clearance so it doesn’t feel tight.
- Peninsula bar: helpful for entertaining and creates a natural zone boundary in open basements.
Clearances and “pinch points” to avoid
- Don’t trap the fridge in a corner. Make sure doors can open and shelves can slide out without hitting a wall.
- Give the dishwasher space. If included, the open door should not block the only path through the kitchenette zone.
- Protect circulation. A kitchenette placed in a main walkway becomes a daily annoyance.
If you’re zoning the entire basement for multiple uses, the layout guide Basement Layout Planning: Zones That Make the Space Feel Bigger can help you decide where the kitchenette belongs in the overall flow.
Step 7: Storage planning that makes a kitchenette feel “complete”
Storage is what separates a pretty kitchenette from one that gets used without frustration. The trick is choosing the right storage for the way the space is used.
Storage priorities by kitchenette type
- Snack zone: pantry drawers for chips/snacks, a “cup zone,” and a hidden trash pull-out.
- Entertaining station: glass storage, bottle storage, serving trays, and a dedicated “bar tools” drawer.
- Apartment-ready: pots/pans storage, full pantry space, a real dish zone, and organized cleaning storage.
For cabinetry and countertop selection guidance (durability, construction, storage features), explore Cabinets and Countertops: Transforming Your Kitchen with the Right Choices.
Step 8: Durability and moisture awareness below grade
Basements behave differently than main floors. Even when moisture is well managed, below-grade spaces can experience higher humidity and temperature swings. That affects material choices.
Durability considerations that matter
- Flooring: choose a surface that tolerates basement conditions and is easy to clean (especially near sinks and fridges).
- Cabinet construction: quality boxes, durable finishes, and thoughtful toe-kick protection help long-term.
- Countertops: choose for real use (spills, heat, cleaning products), not just appearance.
- Moisture strategy: ensure basement moisture is addressed before installing cabinetry and finishes.
Helpful internal resource: Basement Moisture Management & Protection Systems and Basement Moisture Checklist.
Permits and inspections (why this can’t be an afterthought)
Kitchenettes can trigger permits depending on scope—especially when plumbing, new circuits, panel changes, ventilation, or cooking appliances are involved. Requirements vary by jurisdiction and project scope, so confirm with local authorities and qualified professionals.
Related: Permits and Inspections for Basement Finishing: What to Expect in Utah.
Practical note: A “simple kitchenette” becomes a much bigger project the moment you add plumbing, cooking, or major electrical changes. Planning early keeps it predictable.
Pre-cabinet checklist: the 15-minute review that prevents costly changes
Run this checklist before cabinets are ordered:
- Use defined: snack zone, entertaining station, or apartment-ready kitchen?
- Appliance list locked: exact models (or at least exact sizes and power needs) confirmed?
- Clearances checked: fridge doors, dishwasher door, and walkway clearances tested?
- Sink feasibility verified: drain route, slope, venting plan reviewed by a pro?
- Water supply plan: tie-in route and shutoff access planned?
- Electrical circuits mapped: dedicated circuits identified where needed?
- Outlet layout set: countertop outlets placed to match real use?
- Lighting plan: ambient + task + accent + controls planned?
- Ventilation decision: cooking or no cooking, and what that implies?
- Moisture strategy: basement moisture risks addressed before installing cabinets?
- Permit check: scope reviewed for permit/inspection needs?
Conclusion: rough-in planning comes before cabinets (every time)
A basement kitchenette can add huge lifestyle value—whether it’s a convenient snack station or a full basement apartment kitchenette layout. The key is planning the invisible parts early: basement sink plumbing planning, basement kitchenette electrical outlets, appliance specs, and any ventilation requirements.
If you do those steps in order, cabinets fit, outlets land where you need them, and the finished space feels intentional instead of improvised.
Want a basement kitchenette that feels effortless to use?
If you’re remodeling in Davis or Weber County, The Fortress Builders can help you plan the right level of kitchenette, verify rough-in feasibility, and coordinate the full design–build sequence—so your basement feels finished, functional, and built to last.
Request a Design Consult Basement Bathrooms & Kitchenettes Explore Basement Finishing
Bring your basement dimensions, your “must-have” appliance list, and your intended use. We’ll help you confirm what’s feasible before anything gets ordered.