
Basement Egress Basics: What Homeowners Should Know Before Adding a Bedroom
Basement Egress Basics: Egress Window for a Basement Bedroom (Utah Planning Guide)
Bedrooms change the rules of basement planning. If you’re adding a sleeping room downstairs, you’re not just choosing flooring and paint—you’re planning a life-safety path out of the space in an emergency. This guide explains basement egress basics, how to plan an egress window for a basement bedroom, and why basement bedroom egress planning should happen before you finalize your layout.
A homeowner-friendly egress plan helps you:
- choose bedroom locations that actually work with the outside conditions of your home,
- understand how egress windows and window wells affect budget and timeline,
- avoid expensive “late changes” after framing or drywall,
- coordinate permits/inspections without stress,
- and protect your investment with moisture-smart window well details.
In this article, you’ll learn:
- what “egress” means (in plain English) and why bedrooms trigger it,
- the typical egress window requirements and what “net clear opening” really means,
- window well considerations: clearance, drainage, covers, and safety,
- common egress window cost factors and why pricing varies,
- and a step-by-step planning checklist you can use before design is finalized.
The Fortress Builders is a Utah design–build company built on “strength through structure.” That means every remodel starts with a detailed design blueprint (so layout, budget, and timeline align early), and continues with disciplined project management and craftsmanship that holds up—especially for behind-the-scenes life-safety details like egress.
Helpful internal pages while you plan:
- Basement Finishing in Utah: Space, Comfort & Value
- Space Planning for Basement Finishing
- Basement Moisture Management & Protection Systems
- Basement Moisture Checklist: What to Fix Before You Finish the Space
- Permits and Inspections for Basement Finishing: What to Expect in Utah
- Request a Design Consult
Bedrooms change the rules: what “egress” means and why it matters
Let’s start with the core idea. In remodeling conversations, homeowners often say “egress window” as shorthand for “a safe way out.” That’s accurate—just incomplete.
Egress is the ability to exit a space safely, especially in an emergency. For basements, egress usually becomes a bigger conversation when you create a sleeping room (a bedroom) because the code intent is straightforward: if the stairs are blocked by fire or smoke, a person needs another way to get out and rescuers need a way to get in.
Homeowner translation: When you add a basement bedroom, you’re planning for worst-case scenarios. An egress-compliant opening is a safety feature, and it often affects your layout, exterior work, and budget more than people expect.
Egress is also closely tied to permits and inspections. A finished basement might be a straightforward interior project, but the moment you add a bedroom (and especially if you modify foundation openings), your project usually becomes more “code-driven.” That’s not a bad thing—it’s how you protect safety, avoid resale headaches, and make the space feel legitimate and livable.
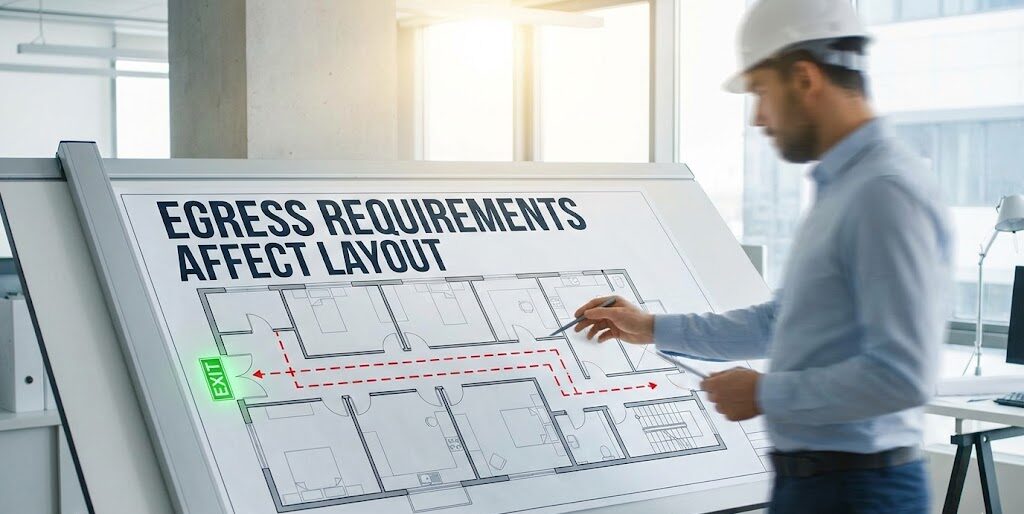
Why egress is a layout decision (not just a window decision)
Here’s a common trap: people design the “perfect” basement layout first, then try to make egress work afterward. That approach can lead to:
- moving bedroom walls late in the process,
- cutting a new foundation opening in a difficult exterior location,
- adding a window well where it interferes with a walkway, patio, or landscaping,
- or settling for a bedroom layout that feels cramped because the egress opening dictates furniture placement.
A better approach is to treat egress as a “primary constraint” during planning—right alongside mechanical room locations, structural beams, stair placement, and plumbing routes. That’s why the Fortress Builders process emphasizes the blueprint first: you solve high-impact constraints early so the build is smoother later.
Start with feasibility: where can a basement bedroom realistically go?
If you’re in the early stages of basement planning, your first goal is not “pick the prettiest bedroom location.” Your first goal is: identify the bedroom locations where egress is feasible without ugly compromises.
A simple feasibility walk-through (10 minutes, no tools)
Walk your basement and then step outside along the corresponding exterior walls. Ask:
- Where are the existing windows? If you already have a window in the right zone, you may be able to upgrade it.
- What’s outside that wall? Decks, patios, window wells, landscaping, retaining walls, utilities, and driveways can all affect feasibility.
- How deep is the wall below grade? The deeper the basement is below outside ground level, the more the window well becomes a major part of the project.
- Is access tight? Tight side yards, fences, and hardscapes can make excavation or well installation harder and more expensive.
- Is water a known issue? If you already see moisture or past water marks, treat that as a “solve first” condition before finishing (see the moisture checklist linked above).
Fast planning rule: Put bedrooms where the egress solution is easiest and cleanest, then design the rest of the basement around that decision.
This usually leads to a better bedroom (more daylight, fewer compromises) and fewer surprises during permits/inspections.
Don’t forget the livability test
Even when egress works on paper, the bedroom still needs to function like a bedroom. In practical terms, that means:
- a realistic bed and dresser layout that doesn’t block the egress path,
- enough wall space for a door, closet, and furniture without “pinching” circulation,
- and a comfort plan (heating/cooling, sound separation, and humidity control) so the room feels like part of the home.
If you haven’t mapped your whole basement yet, start with Space Planning for Basement Finishing and keep an eye on how bedroom zones interact with bathrooms, storage, mechanical access, and hangout spaces.
Basement egress basics: typical requirements (and how to read them correctly)
Egress requirements can vary by jurisdiction and by which building code edition your local authority has adopted. That’s why you’ll see small differences from city to city. Still, many jurisdictions base their standards on widely used residential code frameworks, and the “shape” of the requirements tends to be consistent.
The key for homeowners is not memorizing code sections—it’s understanding the concepts inspectors look for so you can plan with confidence.
What “net clear opening” means (this is the big one)
When you buy a window, the label might say “36" × 48"” or another size. That doesn’t automatically tell you if it’s an egress window. Most egress rules focus on the net clear opening—the actual open space you can climb through when the window is fully open.
Different window styles produce very different net clear openings even if the rough opening looks large. This is why you should always ask for the manufacturer’s egress/net-clear-opening specs for the exact model you’re considering.
|
Net Clear Opening
The usable open space when the window is open. |
This is the measurement that typically matters most for egress. It is not the glass size and not the rough opening size. Always verify this number for the exact window style and configuration you’re installing. |
|
Common Minimums (Typical)
Minimum opening area + minimum opening height/width. |
Many jurisdictions commonly reference baseline minimums such as: net clear opening area around 5.7 sq ft (with some exceptions in certain situations), minimum clear opening height around 24 inches, minimum clear opening width around 20 inches, and maximum sill height around 44 inches. These are “typical baseline concepts,” not a substitute for local review—confirm what applies where you live. |
|
Sill Height
How high the bottom of the opening is above the finished floor. |
A window can be big enough but still fail egress if the bottom of the opening is too high to reach safely. In many code frameworks, the maximum sill height is commonly cited around 44 inches above the finished floor. |
|
Operational Requirements
Must open easily from inside. |
The egress opening should be operable from the inside without special tools, keys, or complex actions. (Exact requirements can vary—follow window manufacturer instructions and local code guidance.) |
Most common homeowner mistake: Buying a “big” window that looks like it should qualify, but the window style reduces the net clear opening once it’s actually open.
Best habit: Ask for the manufacturer’s net-clear-opening specs before ordering.
Video: a practical overview of basement bedroom egress considerations
If you want a visual explanation of the biggest “do it right” factors (legal, safe, and resale-friendly), this video covers the key issues homeowners should consider when adding a bedroom to a finished basement.
Window types: why some styles work better for egress than others
Not all windows are created equal when it comes to net clear opening. The same rough opening size can yield very different usable openings depending on how the sash moves. Here are common window styles and how they often behave in egress planning.
Casement windows (often a strong option)
Casement windows typically swing outward on a hinge, which can create a large clear opening relative to the rough opening size. That’s why they’re often considered “egress-friendly.”
- Pros: often generous net clear opening; can be easier to meet minimum width/height requirements.
- Watch-outs: exterior obstructions (like a well cover design) shouldn’t interfere with operation; verify specs for the exact model.
Sliding windows (possible, but easy to mis-size)
Sliding windows open by moving one panel behind another. The catch is that the open area is typically limited to one portion of the total window width. Sliding windows can work for egress, but sizing requires extra care.
- Pros: simple operation; can be a good choice where outward swing is a concern.
- Watch-outs: net clear opening can be smaller than homeowners assume; verify the actual clear opening.
Single-hung / double-hung (common, but sometimes challenging)
Hung windows open vertically. Depending on the sash design, the usable opening can be limited. In smaller openings, this style can be harder to make work for egress without increasing the overall size.
- Pros: common style; widely available.
- Watch-outs: net clear opening may not meet requirements unless the window is sized larger; confirm with specs.
A note about screens, wells, and “things in the way”
Egress isn’t just about the window unit. It’s also about the path from inside to outside. If a well cover is heavy or awkward, or the well fills with debris, you’ve created a “code checkmark” that doesn’t function well in real life.
Plan the window and well as a system: opening size, sill height, well clearance, ladder/steps if required, and a cover that supports safety without becoming an obstacle.
Window well considerations: clearance, drainage, covers, and safety
In many basement egress situations, the window will be below grade (below the outside ground level). When that happens, a window well becomes part of the egress system. A window well isn’t just “a hole next to the house.” It’s a small exterior environment that needs space, structural stability, and water management.
Clearance: don’t design a well you can’t climb out of
Many jurisdictions require a minimum amount of clear space in front of the egress opening—often commonly cited around 36 inches of projection/clearance— so a person can get out. If the well is deep, ladder or step requirements may apply (commonly referenced when depth exceeds about 44 inches). Verify exactly what applies with your local authority.
Practical tip: If you can design a window well that’s more comfortable than the bare minimum, do it. A slightly larger well can improve daylight, reduce the “claustrophobic” feeling, and make maintenance easier.
But: Bigger wells can affect excavation cost and exterior site impact—this is a design tradeoff worth discussing early.
Drainage: the most overlooked part of egress planning
Window wells collect rain, snow melt, and debris. If that water can’t go somewhere safely, it can become a moisture problem. Drainage strategy depends on your home’s site conditions: soil type, grading, existing footing drains, and the well design itself.
This is why a moisture-first mindset matters—especially in basements. If you haven’t done it yet, review the Basement Moisture Checklist and explore Basement Moisture Management & Protection Systems.
Covers: safety and maintenance without blocking egress
Window well covers help keep out leaves, dirt, and snow. They can also reduce fall risk and keep kids/pets safer around the well. The important point: a cover should not make emergency exit harder.
- Look for usable: can it be opened quickly from inside if someone climbs into the well?
- Think about snow: in winter, drifting snow can build up on covers and reduce light or add weight.
- Plan for cleaning: wells will collect debris; choose a setup that’s easy to maintain.
Sharing a window well between bedrooms: smart idea, but confirm early
Sometimes, homeowners (and designers) plan two basement bedrooms next to each other so both egress windows can use a shared well. This can reduce excavation impacts and consolidate water-management details. Whether it’s allowed—and how it must be designed—depends on local requirements and how the openings and clearances are configured.
Utah basement egress discussion: permits and inspections (what to expect)
In Utah, code adoption and enforcement involve state-adopted standards and local building departments. The practical takeaway for homeowners is: confirm requirements early and treat permits/inspections as part of a smooth, professional process—not a hurdle at the end.
If your basement finish includes a bedroom, you’ll typically want to align early on:
- the intended use of rooms (bedroom vs flex room vs office),
- egress locations and window/well sizing,
- any structural changes (cutting foundation openings),
- electrical plan (outlets, lighting, smoke/CO alarms),
- and mechanical/comfort planning (HVAC supply/return, ventilation strategy).
Why this matters: Egress is easiest (and usually cheapest) to solve on paper. Once framing and finishes start, moving a bedroom wall or shifting an egress location can create delays, rework, and extra cost.
What a “healthy” inspection process often looks like
Inspection steps vary by jurisdiction and scope, but many basement finishing projects follow a familiar rhythm:
- Plan review / permit: drawings or documentation reviewed before work begins.
- Rough inspections: framing, electrical, plumbing (if applicable), and mechanical work inspected before drywall.
- Egress verification: the opening, sill height, well clearance, and operational requirements often get checked as part of the rough/final process.
- Final inspection: verifies the space meets the approved plan and code requirements.
For a more detailed walkthrough tailored to basement projects, see: Permits and Inspections for Basement Finishing: What to Expect in Utah.
Video: why egress becomes part of the basement finishing scope
This video explains the “why” behind egress windows in basement finishing—especially when you’re adding a bedroom or creating other habitable space without an existing compliant exit.
Egress window cost factors: why prices vary so much
Homeowners often ask for a simple number: “How much does an egress window cost?” The honest answer is: it depends—because most of the cost isn’t the window unit itself. The cost is driven by access, excavation, foundation cutting, water management, and how much interior/exterior restoration is required.
The biggest cost drivers (what typically moves the needle)
- New opening vs. existing opening: upgrading an existing window can be simpler than cutting a new foundation opening, but not always.
- Foundation type and thickness: cutting concrete or masonry requires the right tools and careful detailing.
- Exterior access: tight side yards, fences, patios, decks, and landscaping can increase labor and complexity.
- Excavation and soil conditions: depth below grade, soil type, and site constraints affect excavation effort.
- Window well selection: material quality, size, ladder/steps if required, and cover design all affect cost.
- Drainage/water management: if the well requires special drainage integration or site corrections, budget can shift.
- Interior finishing: framing, drywall returns, trim, paint, and how cleanly the window integrates with the bedroom design.
- Permits/engineering: some conditions call for additional documentation or review.
|
Lower Complexity
Costs tend to be more predictable when: |
|
|
Higher Complexity
Costs often rise when: |
|
Budgeting tip: Treat egress work like a “mini exterior project,” not just a window purchase. Include a contingency for hidden conditions—especially in older homes.
Helpful planning resource: Budgeting for Your Remodel
Comfort and safety beyond the window: make the basement bedroom feel real
Egress is the headline requirement for a basement bedroom, but it’s not the only thing that determines whether the space feels safe and comfortable. A well-planned basement bedroom also considers:
- Temperature consistency: basements can run cooler; ensure heating/cooling is planned appropriately.
- Air quality and humidity control: a finished basement should have a humidity plan (especially if you’ve had dampness before).
- Sound control: bedrooms benefit from acoustic planning so they feel private and restful.
- Lighting and electrical: a usable bedroom needs thoughtful lighting, outlets, and safe switching locations.
Two helpful internal reads for comfort planning: Basement Insulation Basics for Comfort and Sound Control and Basement HVAC & Ventilation: Keeping Finished Spaces Comfortable Year-Round.
Resale value: when a basement bedroom helps (and when it can backfire)
A basement bedroom can add real flexibility to a home—guest space, teen suite, multi-generational living, or a private office that can convert later. It can also make the home more appealing to many buyers.
That said, resale confidence depends on whether the bedroom feels legitimate:
- Code-compliant egress: buyers and inspectors notice when a bedroom doesn’t have a safe exit path.
- Healthy, dry conditions: musty odors and dampness raise red flags.
- Good daylight and layout: a basement bedroom should feel like a real room, not a storage area with a bed.
- Permitted work: permitted projects reduce future friction and uncertainty.
If you want to see what finished basements can look like when they’re designed and built cohesively, browse: Basement Remodel Portfolio — Finished Spaces.
Basement bedroom egress planning checklist (print this before design is final)
Use this checklist during planning and your design consult:
- Room use confirmed: Is the space truly intended as a bedroom (sleeping room), or would “flex room/office” better match your goals and constraints?
- Egress location chosen early: Which exterior wall will serve the bedroom, and what’s outside that wall (decks, patios, utilities, landscaping, grades)?
- Existing opening vs new opening: Can an existing window be upgraded, or is a new foundation opening required?
- Net clear opening verified: Do you have manufacturer specs showing the window meets net clear opening requirements for your jurisdiction?
- Sill height verified: Is the opening height from the finished floor within allowable limits?
- Well clearance planned: If below grade, does the well provide required clearance and any ladder/step solution if needed?
- Drainage strategy discussed: How will water leave the well? What’s the plan for snow melt and debris? Who owns ongoing maintenance?
- Cover strategy decided: Does the cover improve safety and debris control without making emergency exit difficult?
- Furniture plan tested: Can you place a bed and dresser without blocking egress access?
- Moisture risk addressed: If the basement has ever been damp, what’s the mitigation plan before finishes go in?
- Comfort planned: Is the bedroom heated/cooled appropriately and designed for reasonable sound/privacy?
- Permits/inspections confirmed: What permits are required and when will egress be inspected in your jurisdiction?
FAQs: quick answers homeowners ask about basement egress
Do I need an egress window for a basement bedroom?
In many jurisdictions, sleeping rooms require an emergency escape and rescue opening, which is often provided by an egress-compliant window. Requirements vary by jurisdiction and existing conditions, so confirm early with your local building department and qualified professionals.
What is “net clear opening,” and why do people fail egress even with a big window?
Net clear opening is the actual open space you can climb through when the window is open. Some window styles reduce the usable opening significantly. That’s why the manufacturer’s net-clear-opening specs matter more than the window’s label size.
Can I use the window that’s already in my basement?
Sometimes. If the existing opening can be upgraded to meet requirements (opening size, sill height, operation) and the well configuration (if needed) meets clearance and safety rules, an existing window can work. Many older basement windows are too small, too high, or poorly located—so this requires evaluation.
Do window wells always need drains?
Drainage strategy depends on your site conditions and local requirements. The big idea is that water must not collect in the well in a way that increases moisture risk for the basement. Discuss drainage early—especially if you’ve ever had water or dampness in the basement.
Can two basement bedrooms share one egress well?
Sometimes this approach is used, but acceptance and design requirements vary by jurisdiction. If you’re considering it, treat it as an early design decision and confirm with your local authority during planning.
Does adding a basement bedroom automatically increase home value?
Not automatically. A well-designed, code-compliant, comfortable bedroom can improve appeal and flexibility. But a “bedroom” that feels improvised, lacks egress, or has moisture issues can create buyer hesitation. Plan the bedroom like a long-term living space, not a checkbox.
Video: “What is an egress window?” (concept explainer)
This video is a helpful visual explainer of what an egress window is and why it’s required for a basement bedroom. (Note: the creator references a specific jurisdiction’s code in their example—use it to understand the concept and verify Utah/local requirements with your building department.)
Conclusion: plan egress early, and your whole basement plan gets easier
The best basement bedrooms feel like they always belonged in the home: comfortable, bright enough to enjoy, and safe in an emergency. You get there by treating basement egress basics as an early planning step—not a last-minute checkbox.
If you’re planning a basement finish in Davis or Weber County and want a clear, confidence-building process—from layout feasibility and egress planning through permits and durable construction—The Fortress Builders can help. Start with Basement Finishing in Utah, browse the Basement Remodel Portfolio, and when you’re ready, reach out for a consult.
Ready to plan a basement bedroom the right way?
Bring your basement photos, exterior constraints (patios, decks, grades), and your wish list. We’ll help you map a bedroom layout and egress strategy that makes sense for safety, permits, and daily life—before you commit to walls and finishes.
Request a Design Consult Basement Space Planning Moisture Checklist