
Basement Soundproofing Strategies: What Works (and What Doesn’t)
Soundproofing is one of the most misunderstood parts of basement finishing. Many homeowners buy a “soundproof” product expecting magic—then feel disappointed when footsteps, voices, or bass still travel through the house.
This guide explains basement soundproofing strategies the way pros approach them: as a set of assemblies and details (mass, decoupling, absorption, sealing)—not one miracle material.
In this homeowner-friendly guide, you’ll learn:
- the difference between airborne noise and impact noise (and why it matters),
- what typically works best to reduce noise between floors,
- how to plan a soundproof basement ceiling for footsteps and theater bass,
- what to do for soundproofing walls basement spaces like bedrooms and offices,
- how doors, gaps, and HVAC can quietly defeat your whole plan,
- what tends to disappoint (and why),
- and realistic expectation + budget tiers so you can choose a sound goal early.
The Fortress Builders is a Utah design–build company built on “strength through structure.” That means sound control is coordinated early with layout, framing, HVAC routes, lighting, and finishes—so your basement can be lively where you want it (game room, theater) and quiet where you need it (bedroom, office).
Helpful internal pages while you plan:
Soundproofing is about assemblies, not magic products
If you remember one thing from this guide, make it this: a quiet basement is the result of multiple systems working together. The best results come from combining:
- Mass: heavier layers slow sound transfer.
- Decoupling: breaking vibration paths reduces structure-borne noise.
- Absorption: insulation reduces resonance in cavities.
- Sealing: air leaks act like little speakers for sound.
When one of these is missing, even expensive materials can disappoint.
Homeowner takeaway: The “best” soundproofing product is the one that fits a well-designed assembly. On its own, no single product can do everything.
Step 1: Identify the noise type (airborne vs. impact)
Different noises travel differently, which is why some strategies work well for voices but not for footsteps.
Airborne noise (voices, TV dialogue, music)
Airborne noise travels through the air, then vibrates surfaces (drywall, floor) and transfers through framing. You’ll notice it as muffled voices or a TV that “leaks” into other rooms.
Impact noise (footsteps, dropped items, kids running)
Impact noise travels as vibration through the structure. It’s often the hardest to solve from below because the vibration starts at the floor above.
Quick diagnosis question:
- If you hear words clearly: airborne noise is your main issue.
- If you hear thumps and feel vibration: impact noise is your main issue.
- If you hear both: you’ll likely need a multi-step ceiling assembly.
Step 2: The best-bang strategies for reducing noise between floors
When homeowners ask about basement soundproofing, they usually mean one thing: “How do I stop the upstairs from sounding like a herd of elephants?” That’s a reduce noise between floors question—and it typically points to the ceiling assembly.
Strategy A: Improve the ceiling cavity (absorption)
Filling the ceiling cavity with sound-absorbing insulation can reduce resonance and help with airborne noise. It’s usually a foundational step, not a complete solution—especially for impact noise.
Strategy B: Add mass to the ceiling (mass)
Heavier ceiling layers (often multiple drywall layers) can reduce transmission, particularly for voices and mid-frequency sounds. The key is that mass works best when paired with sealing and, ideally, decoupling.
Strategy C: Decouple the ceiling (decoupling)
Decoupling reduces structure-borne vibration transfer. This is often one of the most effective moves for impact noise when done correctly as part of a full assembly.
Reality check: If footsteps are your main complaint, insulation alone is rarely enough. You typically need decoupling and mass in the ceiling assembly.
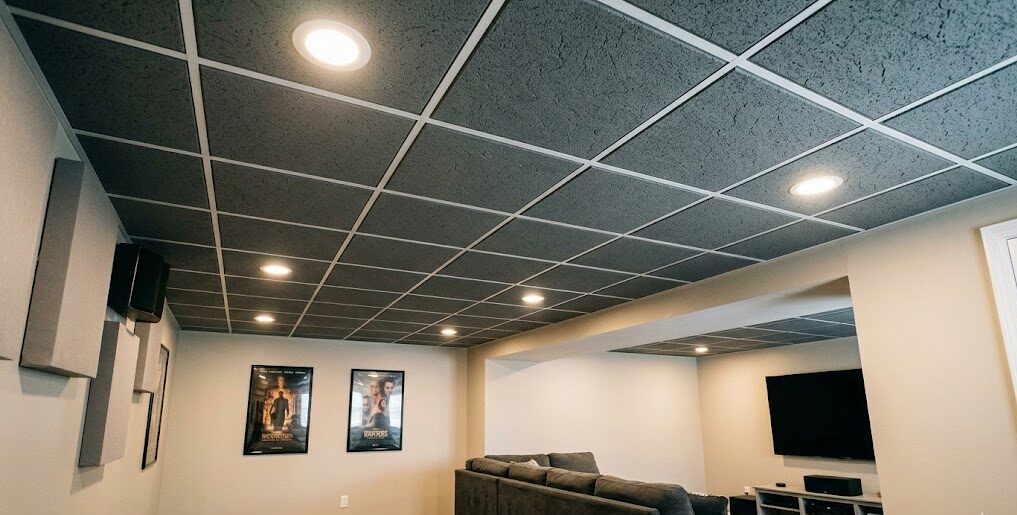
Step 3: Soundproof basement ceiling planning (what works best)
A soundproof basement ceiling strategy is usually a combination approach. The exact assembly depends on your goals, budget, and ceiling height constraints.
Tier 1: “Better than before” (basic improvement)
- Sound-absorbing insulation in joist bays
- Careful air sealing around penetrations
- Dimmable, low-profile lighting planned to reduce penetrations
This tier improves comfort, especially for voices and general household noise, but may not fully solve footsteps or theater bass.
Tier 2: “Noticeably quieter” (balanced assembly)
- Insulation in joist bays
- Decoupling method (as designed by your builder)
- Added ceiling mass (often additional drywall layer)
- Sealing strategy at perimeter and penetrations
Tier 3: “Theater/bedroom serious” (high-performance)
- Full decoupled ceiling design
- High-quality insulation
- Multiple layers of ceiling mass
- Carefully controlled penetrations and airtight sealing
- Coordinated HVAC noise strategy
This tier is often used for basement theater sound control goals, recording areas, or sleeping zones beneath active living areas.
Ceiling height, soffits, lighting, and duct routes all affect what’s feasible. That’s why sound planning should be coordinated with Basement Lighting for Low Ceilings and your overall Basement Space Planning.
Step 4: Soundproofing walls basement spaces (bedrooms, offices, theaters)
Wall soundproofing typically matters for:
- basement bedrooms (privacy and sleep),
- home offices (focus and call clarity),
- theater rooms (keeping sound in, keeping noise out),
- utility/mechanical adjacency (reducing equipment noise).
What wall strategies tend to work
- Absorption: sound-absorbing insulation in wall cavities.
- Mass: additional drywall layers where appropriate.
- Decoupling: construction methods that reduce vibration transfer in assemblies.
- Sealing: airtight perimeter and outlet sealing where applicable.
Layout is a sound strategy
One of the most overlooked “soundproofing” tactics is zoning. A storage room, closet, or hallway between a theater and a bedroom is a powerful buffer. If you haven’t finalized your basement layout, see Basement Layout Planning.
Step 5: Seal the gaps (the part that makes expensive systems fail)
Sound travels through air leaks. If your ceiling assembly is great but your rim joist area, can light penetrations, duct penetrations, or electrical openings leak air, sound will leak too.
Common leak points
- recessed light cans and electrical boxes
- duct boots and returns
- plumbing penetrations
- rim joists and top plates
- door undercuts and unsealed frames
Homeowner takeaway: Sealing isn’t glamorous, but it’s one of the highest-ROI sound control steps. Many “soundproofing failures” are actually air leak failures.
Step 6: Door strategies (weak doors cancel strong walls)
If you’re soundproofing a theater or bedroom, doors matter. A hollow-core door can undermine a high-quality wall assembly because it’s lighter, leaks more air, and vibrates more easily.
Door upgrades that often matter
- Solid-core doors: heavier and typically better for sound control.
- Better seals: perimeter seals reduce air leakage.
- Thoughtful thresholds: manage under-door gaps (balanced with HVAC return needs).
Door requirements and airflow strategies can vary by home and design. Confirm with your contractor—especially if your HVAC system relies on return paths through door undercuts.
Step 7: HVAC noise (the “why is my room still loud?” surprise)
Even if your walls and ceiling are strong, HVAC can reintroduce noise through two common paths:
- Mechanical noise: fan noise, duct vibration, or equipment hum.
- Sound paths: ducts can act like tunnels that carry sound between rooms.
HVAC strategies that often help
- plan duct routes intentionally so they don’t bridge quiet rooms directly to loud rooms
- reduce vibration transfer with thoughtful mechanical detailing
- avoid oversized or noisy grilles in sensitive zones
- coordinate returns and supply placement early
HVAC strategies are system-specific. See Basement HVAC & Ventilation Planning and confirm details with qualified professionals.
What typically disappoints (and why)
Homeowners often spend money on products that don’t deliver because the assembly wasn’t designed to support them. Here are common disappointment patterns:
1) “Soundproof paint” expectations
Paint alone adds negligible mass and does not decouple structures. It may slightly change surface properties, but it’s not a meaningful soundproofing solution for real-world basement noise.
2) Foam panels as “soundproofing”
Foam panels can reduce echo inside a room (sound absorption), but they don’t meaningfully block sound transfer through walls or ceilings.
3) Insulation-only approaches for footsteps
Insulation helps with airborne noise. Footsteps are impact noise. Without decoupling and mass, results often feel underwhelming.
Sound reality: “Absorption” (reducing echo) is not the same as “isolation” (blocking transfer). Many products are sold as isolation but function as absorption.
Expectation + budget tiers (choose a realistic sound goal early)
Sound control is not all-or-nothing. The best outcomes happen when you define a goal and build the assembly to match it.
Goal A: “Take the edge off”
- Reduce voices and general household noise
- Improve comfort for day-to-day basement use
- Minimal ceiling height impact
Goal B: “Quiet enough for bedrooms and offices”
- Strong reduction of voices and TV noise
- Some improvement on footsteps, depending on assembly
- More attention to doors, sealing, and duct routes
Goal C: “Theater-level sound control”
- Reduce bass transfer and movie impact as much as feasible
- Requires full-system planning: ceiling, walls, doors, HVAC, and layout
- Often affects ceiling height, budget, and complexity
If you’re building a theater, pair this guide with Home Theater Basics so layout, sightlines, and sound strategy are coordinated.
Permits, inspections, and code notes
Soundproofing work often overlaps with electrical, HVAC, and framing changes, which can trigger permits and inspections depending on scope and jurisdiction. Requirements vary—confirm with qualified professionals and local authorities, especially when modifying ceiling assemblies, moving ducts, adding circuits, or changing egress-related walls.
Related: Permits and Inspections for Basement Finishing.
Soundproofing planning checklist (use before framing and drywall)
Before you commit to a soundproofing plan, confirm:
- Your sound goal: take the edge off, bedroom/office quiet, or theater-level control?
- Noise type: airborne, impact, or both?
- Target surfaces: ceiling only, walls only, or full room envelope?
- Sealing plan: how will penetrations be sealed (lights, ducts, plumbing)?
- Door plan: solid-core, seals, thresholds, and airflow strategy?
- HVAC plan: will ducting carry sound between rooms?
- Layout buffers: can closets/storage/halls separate loud zones from quiet zones?
- Ceiling height impact: will your chosen assembly affect headroom or soffit design?
- Budget tier alignment: does the plan match the goal realistically?
Conclusion: choose a realistic sound goal early, then build the assembly to match
Soundproofing is not a single product decision. It’s a design decision—about the assemblies you build and the details you seal. If you want to reduce noise between floors, plan the ceiling system as a combination of absorption, mass, and (when needed) decoupling. If you want quieter bedrooms or a better theater, don’t forget doors, HVAC paths, and layout buffers.
The smartest move is to set a sound goal early—before framing and drywall lock in the structure—so you can choose a strategy that’s realistic for your basement, your budget, and how you’ll actually use the space.
Want a quieter basement without wasting money on the wrong “soundproof” products?
If you’re finishing a basement in Davis or Weber County, The Fortress Builders can help you define a sound goal, select the right assembly approach, and coordinate sound control with lighting, HVAC, and layout—so you get results that feel real in daily life.
Request a Design Consult Comfort and Sound Explore Basement Finishing
Bring your biggest noise complaint (footsteps, voices, bass, or all of the above). We’ll help you map a strategy that matches what you actually want.